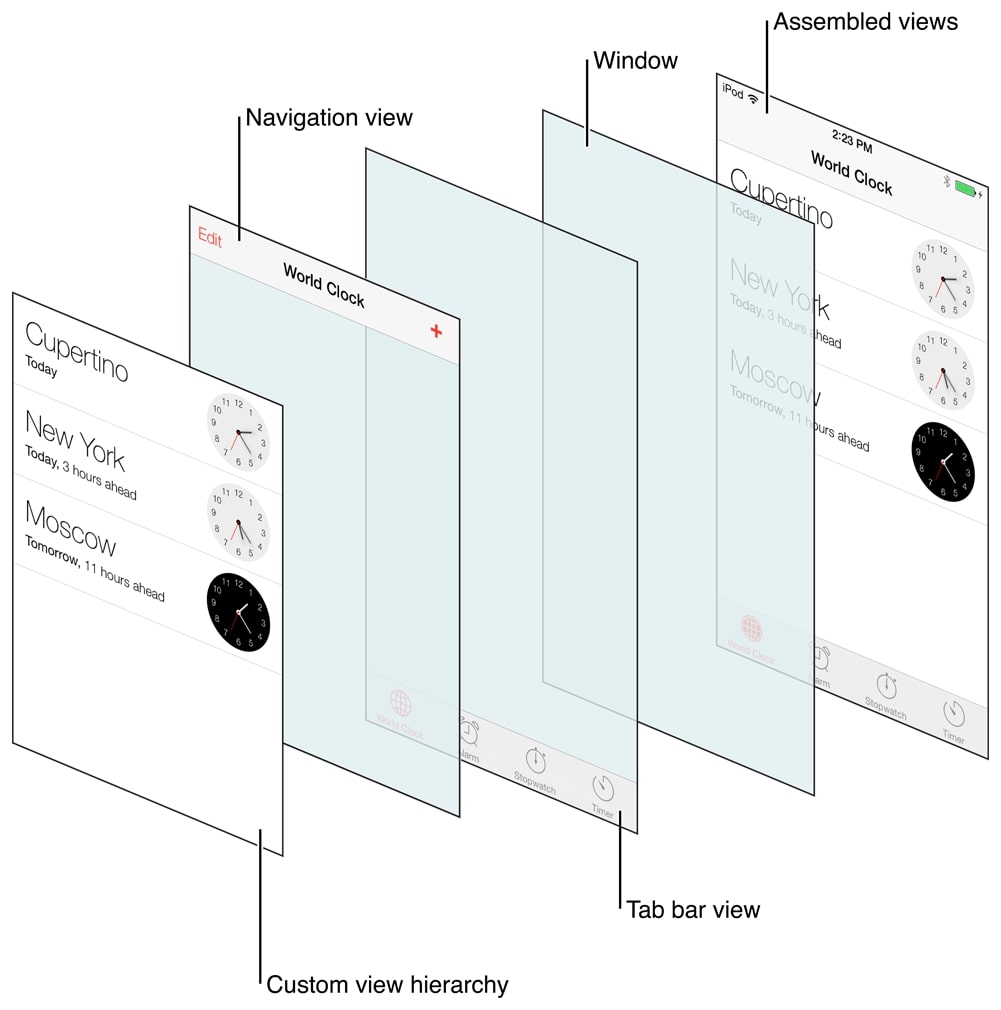
用 UIKit 开发 iOS 移动应用时,我一直倾向于采用纯代码的方式。storyboard 起初看起来也许很方便,但它总让我觉得自己更像设计师而不是程序员。而且在可扩展性和可管理性方面,我始终认为纯代码的方式更胜一筹。
在本文中,我会详细介绍如何使用 UIKit 创建一个结合了 navigation controller 的 tab bar controller。
配置 SceneDelegate
采用纯代码方式的第一步,是修改应用的根代码。我把它叫做“根”,它让我想起 React/React Native 里的 App.js 或 index.js。这里是应用或 scene 的入口。在 iOS 中,我们可以在 SceneDelegate 类里找到一个 scene 函数,我们只会用它来配置应用,以便用纯代码进行开发。
下面是 SceneDelegate 类的默认结构:
    import UIKit

    class SceneDelegate: UIResponder, UIWindowSceneDelegate {

      var window: UIWindow?


      func scene(_ scene: UIScene, willConnectTo session: UISceneSession, options connectionOptions: UIScene.ConnectionOptions) {
        // Use this method to optionally configure and attach the UIWindow `window` to the provided UIWindowScene `scene`.
        // If using a storyboard, the `window` property will automatically be initialized and attached to the scene.
        // This delegate does not imply the connecting scene or session are new (see `application:configurationForConnectingSceneSession` instead).
        guard let _ = (scene as? UIWindowScene) else { return }
      }

      func sceneDidDisconnect(_ scene: UIScene) {
        // Called as the scene is being released by the system.
        // This occurs shortly after the scene enters the background, or when its session is discarded.
        // Release any resources associated with this scene that can be re-created the next time the scene connects.
        // The scene may re-connect later, as its session was not necessarily discarded (see `application:didDiscardSceneSessions` instead).
      }

      func sceneDidBecomeActive(_ scene: UIScene) {
        // Called when the scene has moved from an inactive state to an active state.
        // Use this method to restart any tasks that were paused (or not yet started) when the scene was inactive.
      }

      func sceneWillResignActive(_ scene: UIScene) {
        // Called when the scene will move from an active state to an inactive state.
        // This may occur due to temporary interruptions (ex. an incoming phone call).
      }

      func sceneWillEnterForeground(_ scene: UIScene) {
        // Called as the scene transitions from the background to the foreground.
        // Use this method to undo the changes made on entering the background.
      }

      func sceneDidEnterBackground(_ scene: UIScene) {
        // Called as the scene transitions from the foreground to the background.
        // Use this method to save data, release shared resources, and store enough scene-specific state information
        // to restore the scene back to its current state.
      }
    }
我们只会修改下面这个函数:
func scene(_ scene: UIScene, willConnectTo session: UISceneSession, options connectionOptions: UIScene.ConnectionOptions) {
    // Use this method to optionally configure and attach the UIWindow `window` to the provided UIWindowScene `scene`.
    // If using a storyboard, the `window` property will automatically be initialized and attached to the scene.
    // This delegate does not imply the connecting scene or session are new (see `application:configurationForConnectingSceneSession` instead).
    guard let _ = (scene as? UIWindowScene) else { return }
  }
修改 SceneDelegate 中的 scene 函数
在下面的代码片段中,我们用 guard 语句安全地获取 windowScene。接着,把这个 windowScene 赋给 SceneDelegate 类中定义的 window 属性。最后,调用 makeKeyAndVisible 方法,让这个 window 成为 key window。
var window: UIWindow?

func scene(\_ scene: UIScene, willConnectTo session: UISceneSession, options connectionOptions: UIScene.ConnectionOptions) {
guard let windowScene = (scene as? UIWindowScene) else { return }
window?.windowScene = windowScene
window?.makeKeyAndVisible()
}
接下来,我们专注于创建 tab bar controller。这个 controller 负责管理应用中每个 tab 的 view controller。比如,如果我们有两个 tab,就需要两个独立的 navigation controller。 那为什么要选择 navigation controller 呢?因为我们希望每个 tab 内都有自己的 navigation controller。以“Profile”这个 tab 为例。profile 页面是这个 tab 的主视图,但这个 tab 里可能还有其他视图需要相互跳转。所以我们为每个 tab item 使用 navigation controller,它们提供了在一个 tab 内的不同 view controller 之间顺畅跳转所需的功能。
开始写代码吧!
 func scene(_ scene: UIScene, willConnectTo session: UISceneSession, options connectionOptions: UIScene.ConnectionOptions) {
    guard let windowScene = (scene as? UIWindowScene) else { return }
    window?.windowScene = windowScene
    window?.makeKeyAndVisible()

    let tabbar = UITabBarController()

    let firstVC = UINavigationController(rootViewController: ViewController())
    let secondVC = UINavigationController(rootViewController: SecondViewController())


    firstVC.tabBarItem = UITabBarItem(title: "Home", image: UIImage(systemName: "house"),selectedImage: UIImage(systemName: "house.fill"))

    secondVC.tabBarItem = UITabBarItem(title: "Profile", image: UIImage(systemName: "person"),selectedImage: UIImage(systemName: "person.fill"))

    tabbar.viewControllers = [firstVC, secondVC]

    window?.rootViewController = tabbar

  }
初始化 tab bar controller 之后,我们创建两个 navigation controller,对应应用中的两个 tab item。第一个 view controller 是默认的那个,第二个 view controller 叫 SecondViewController,会在下一节介绍。SecondViewController 是一个普通的 view controller,和默认的那个类似。
为了配置 tab item,我们用 UITabBarItem 设置每个 navigation controller 的 tabItem 属性。
最后,我们把创建好的 view controller 赋给 tab bar controller 的 viewControllers 属性。
而最关键的一步,是把 window 的 rootViewController 设置为我们的 tab bar controller。这样可以确保 tab bar 以及每个 tab item 里的 navigation controller 位于应用层级的最顶层。
View Controller 实际效果
来看看下面的 ViewController 类:
class ViewController: UIViewController {

    override func viewDidLoad() {
      super.viewDidLoad()
      setupUI()
    }

    func setupUI(){
      view.backgroundColor = .white

      let homeLabel: UILabel = {
        let label = UILabel()
        label.text = "This is home screen"
        label.translatesAutoresizingMaskIntoConstraints = false
        return label
      }()

      let homeButton: UIButton = {
        let button = UIButton()
        button.setTitle("Go to profile", for: .normal)
        button.setTitleColor(.white, for: .normal)
        button.backgroundColor = .systemOrange
        button.translatesAutoresizingMaskIntoConstraints = false
        button.addTarget(self, action: #selector(goToProfile), for: .touchUpInside)
        return button
      }()

      view.addSubview(homeButton)
      view.addSubview(homeLabel)


      NSLayoutConstraint.activate([
        homeButton.bottomAnchor.constraint(equalTo: view.safeAreaLayoutGuide.bottomAnchor),
        homeButton.widthAnchor.constraint(equalTo: view.widthAnchor),
        homeButton.heightAnchor.constraint(equalToConstant: 72),
        homeLabel.centerXAnchor.constraint(equalTo: view.centerXAnchor),
        homeLabel.centerYAnchor.constraint(equalTo: view.centerYAnchor)
      ])

    }

    @objc func goToProfile(){
      tabBarController?.selectedIndex = 1
    }

}
还有 SecondViewController(我知道,这个命名确实不太好……)

class SecondViewController: UIViewController {
override func viewDidLoad() {
super.viewDidLoad()
setupUI()
}

    func setupUI(){
      view.backgroundColor = .white

      let profileLabel: UILabel = {
        let label = UILabel()
        label.translatesAutoresizingMaskIntoConstraints = false
        label.text = "This is profile screen"
        return label
      }()

      let profileButton: UIButton = {
        let button = UIButton()
        button.setTitle("Go to home", for: .normal)
        button.setTitleColor(.white, for: .normal)
        button.backgroundColor = .systemOrange
        button.translatesAutoresizingMaskIntoConstraints = false
        button.addTarget(self, action: #selector(goToHome), for: .touchUpInside)
        return button
      }()

      view.addSubview(profileButton)
      view.addSubview(profileLabel)

      NSLayoutConstraint.activate([
        homeButton.bottomAnchor.constraint(equalTo: view.safeAreaLayoutGuide.bottomAnchor),
        homeButton.widthAnchor.constraint(equalTo: view.widthAnchor),
        homeButton.heightAnchor.constraint(equalToConstant: 72),
        homeLabel.centerXAnchor.constraint(equalTo: view.centerXAnchor),
        homeLabel.centerYAnchor.constraint(equalTo: view.centerYAnchor)
      ])

    }

    @objc func goToHome(){
      tabBarController?.selectedIndex = 0
    }

}
很明显,这段代码相当重复。不过对于本文的目的来说,可以先忽略。
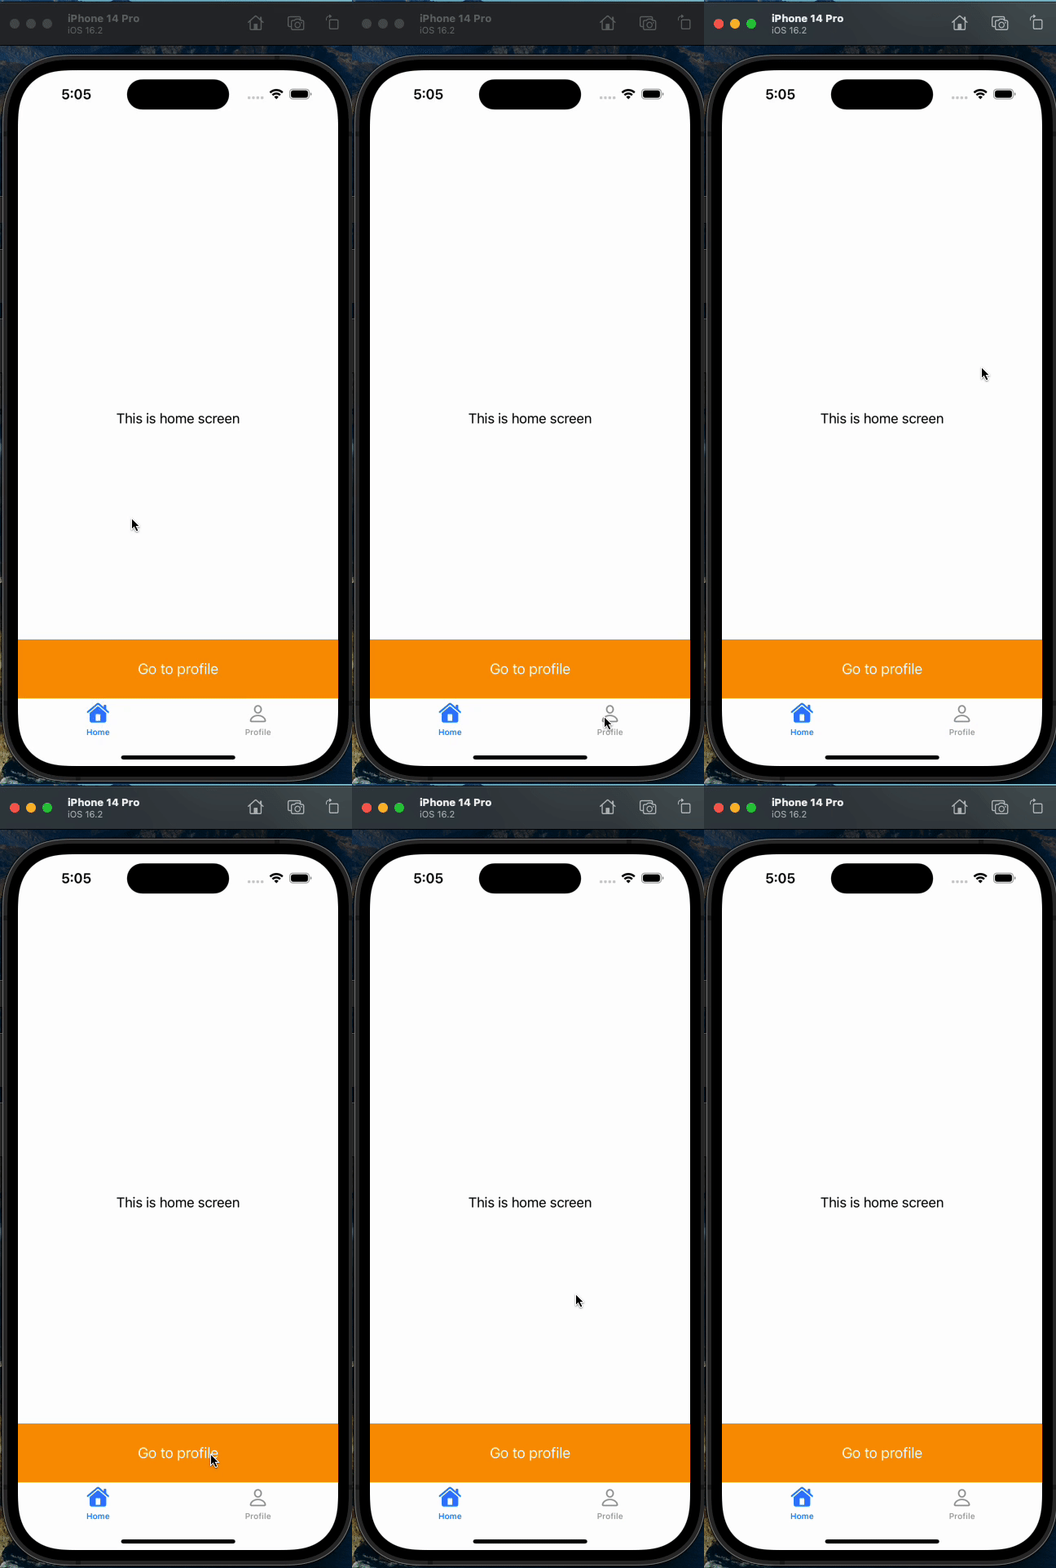
这两个 view controller 基本相同,只有标题和按钮操作不一样。两个 controller 主要都是在屏幕中央渲染一个 label,显示当前页面的名称。此外,它们在屏幕底部都有一个按钮,可以在 tab item 之间切换。这就是这两个 view controller 的核心功能。
最终效果
现在我们有了一个完全用代码实现、使用 tab bar 和 navigation controller 的应用,一个 storyboard 都没有!
总结
总之,采用纯代码的方式能让你对应用的设计和可扩展性有更大的控制权,让开发者专注于编程本身,而不是只依赖 storyboard。尤其是 IBAction/IBOutlet 的问题。重构涉及 IBOutlet 和 IBAction 变量的代码时,一个常见的问题是改动之后需要重新建立连接。根据我的经验,在代码库上工作几天之后,我遇到了应用莫名其妙崩溃的情况,没有任何明确的提示。进一步排查后,我发现崩溃的原因是 IBOutlet 和 IBAction 变量被重命名了。每次发生这种情况,我都得手动重新连接受影响的变量,才能让它们恢复正常。这个过程既耗时又令人沮丧,会打断开发节奏。
感谢阅读!