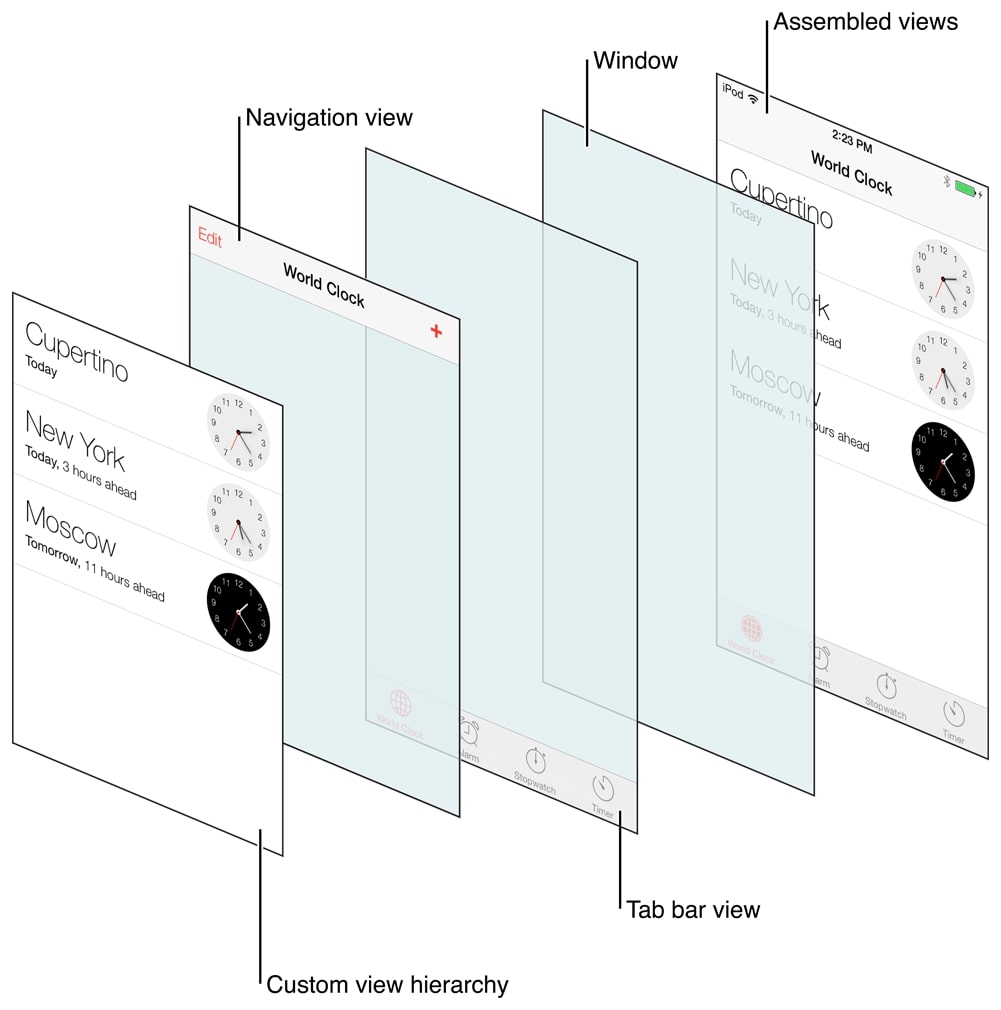
Розробляючи мобільні застосунки для iOS на UIKit, я завжди схилявся до програмного підходу. Storyboards спершу можуть здаватися зручними, але з ними я почуваюся радше дизайнером, ніж програмістом. До того ж, коли йдеться про масштабованість і керованість, програмний підхід щоразу виявляється для мене кращим.
У цій статті я детально розповім, як створити tab bar controller у поєднанні з navigation controller на UIKit.
Налаштування SceneDelegate
Перший крок до програмного підходу полягає в тому, щоб змінити кореневий код застосунку. Я називаю його «коренем», і він нагадує мені App.js або index.js у React/React Native. Це точка входу в наш застосунок або сцену. В iOS у класі SceneDelegate є функція scene, і ми використаємо лише її, щоб налаштувати застосунок для розробки кодом.
Нижче стандартна структура класу SceneDelegate:
    import UIKit

    class SceneDelegate: UIResponder, UIWindowSceneDelegate {

      var window: UIWindow?


      func scene(_ scene: UIScene, willConnectTo session: UISceneSession, options connectionOptions: UIScene.ConnectionOptions) {
        // Use this method to optionally configure and attach the UIWindow `window` to the provided UIWindowScene `scene`.
        // If using a storyboard, the `window` property will automatically be initialized and attached to the scene.
        // This delegate does not imply the connecting scene or session are new (see `application:configurationForConnectingSceneSession` instead).
        guard let _ = (scene as? UIWindowScene) else { return }
      }

      func sceneDidDisconnect(_ scene: UIScene) {
        // Called as the scene is being released by the system.
        // This occurs shortly after the scene enters the background, or when its session is discarded.
        // Release any resources associated with this scene that can be re-created the next time the scene connects.
        // The scene may re-connect later, as its session was not necessarily discarded (see `application:didDiscardSceneSessions` instead).
      }

      func sceneDidBecomeActive(_ scene: UIScene) {
        // Called when the scene has moved from an inactive state to an active state.
        // Use this method to restart any tasks that were paused (or not yet started) when the scene was inactive.
      }

      func sceneWillResignActive(_ scene: UIScene) {
        // Called when the scene will move from an active state to an inactive state.
        // This may occur due to temporary interruptions (ex. an incoming phone call).
      }

      func sceneWillEnterForeground(_ scene: UIScene) {
        // Called as the scene transitions from the background to the foreground.
        // Use this method to undo the changes made on entering the background.
      }

      func sceneDidEnterBackground(_ scene: UIScene) {
        // Called as the scene transitions from the foreground to the background.
        // Use this method to save data, release shared resources, and store enough scene-specific state information
        // to restore the scene back to its current state.
      }
    }
Ми змінимо лише цю функцію:
func scene(_ scene: UIScene, willConnectTo session: UISceneSession, options connectionOptions: UIScene.ConnectionOptions) {
    // Use this method to optionally configure and attach the UIWindow `window` to the provided UIWindowScene `scene`.
    // If using a storyboard, the `window` property will automatically be initialized and attached to the scene.
    // This delegate does not imply the connecting scene or session are new (see `application:configurationForConnectingSceneSession` instead).
    guard let _ = (scene as? UIWindowScene) else { return }
  }
Оновлюємо функцію scene у SceneDelegate
У фрагменті нижче ми безпечно отримуємо windowScene за допомогою оператора guard. Потім присвоюємо цей windowScene властивості window, яка визначена в класі SceneDelegate. Насамкінець викликаємо метод makeKeyAndVisible, щоб зробити це вікно головним (key window).
var window: UIWindow?

func scene(\_ scene: UIScene, willConnectTo session: UISceneSession, options connectionOptions: UIScene.ConnectionOptions) {
guard let windowScene = (scene as? UIWindowScene) else { return }
window?.windowScene = windowScene
window?.makeKeyAndVisible()
}
Далі зосередьмося на створенні tab bar controller. Цей контролер керуватиме view controllers для кожної вкладки застосунку. Наприклад, якщо у нас дві вкладки, знадобляться два окремі navigation controllers. Але чому саме navigation controllers? Тому що ми хочемо мати власний navigation controller у кожній вкладці. Візьмімо для прикладу вкладку «Profile». Екран профілю буде головним view цієї вкладки, але всередині неї можуть бути й інші views, між якими ми хочемо переходити. Тому для кожного елемента вкладки ми використовуємо navigation controllers. Вони дають потрібну функціональність для плавних переходів між різними view controllers у межах вкладки.
Пишімо код!
 func scene(_ scene: UIScene, willConnectTo session: UISceneSession, options connectionOptions: UIScene.ConnectionOptions) {
    guard let windowScene = (scene as? UIWindowScene) else { return }
    window?.windowScene = windowScene
    window?.makeKeyAndVisible()

    let tabbar = UITabBarController()

    let firstVC = UINavigationController(rootViewController: ViewController())
    let secondVC = UINavigationController(rootViewController: SecondViewController())


    firstVC.tabBarItem = UITabBarItem(title: "Home", image: UIImage(systemName: "house"),selectedImage: UIImage(systemName: "house.fill"))

    secondVC.tabBarItem = UITabBarItem(title: "Profile", image: UIImage(systemName: "person"),selectedImage: UIImage(systemName: "person.fill"))

    tabbar.viewControllers = [firstVC, secondVC]

    window?.rootViewController = tabbar

  }
Після ініціалізації tab bar controller ми створюємо два navigation controllers, які відповідають двом вкладкам застосунку. Перший view controller стандартний, а другий, SecondViewController, ми розглянемо в наступному розділі. SecondViewController звичайний view controller, схожий на стандартний.
Щоб налаштувати вкладки, ми задаємо властивість tabItem кожного navigation controller за допомогою UITabBarItem.
Потім присвоюємо створені view controllers властивості viewControllers нашого tab bar controller.
І найважливіший крок: робимо tab bar controller значенням rootViewController вікна. Так tab bar разом із navigation controllers у кожній вкладці опиняється на вершині ієрархії застосунку.
View controllers у дії
Погляньмо на наш клас ViewController:
class ViewController: UIViewController {

    override func viewDidLoad() {
      super.viewDidLoad()
      setupUI()
    }

    func setupUI(){
      view.backgroundColor = .white

      let homeLabel: UILabel = {
        let label = UILabel()
        label.text = "This is home screen"
        label.translatesAutoresizingMaskIntoConstraints = false
        return label
      }()

      let homeButton: UIButton = {
        let button = UIButton()
        button.setTitle("Go to profile", for: .normal)
        button.setTitleColor(.white, for: .normal)
        button.backgroundColor = .systemOrange
        button.translatesAutoresizingMaskIntoConstraints = false
        button.addTarget(self, action: #selector(goToProfile), for: .touchUpInside)
        return button
      }()

      view.addSubview(homeButton)
      view.addSubview(homeLabel)


      NSLayoutConstraint.activate([
        homeButton.bottomAnchor.constraint(equalTo: view.safeAreaLayoutGuide.bottomAnchor),
        homeButton.widthAnchor.constraint(equalTo: view.widthAnchor),
        homeButton.heightAnchor.constraint(equalToConstant: 72),
        homeLabel.centerXAnchor.constraint(equalTo: view.centerXAnchor),
        homeLabel.centerYAnchor.constraint(equalTo: view.centerYAnchor)
      ])

    }

    @objc func goToProfile(){
      tabBarController?.selectedIndex = 1
    }

}
І на SecondViewController (так-так, назва невдала…)

class SecondViewController: UIViewController {
override func viewDidLoad() {
super.viewDidLoad()
setupUI()
}

    func setupUI(){
      view.backgroundColor = .white

      let profileLabel: UILabel = {
        let label = UILabel()
        label.translatesAutoresizingMaskIntoConstraints = false
        label.text = "This is profile screen"
        return label
      }()

      let profileButton: UIButton = {
        let button = UIButton()
        button.setTitle("Go to home", for: .normal)
        button.setTitleColor(.white, for: .normal)
        button.backgroundColor = .systemOrange
        button.translatesAutoresizingMaskIntoConstraints = false
        button.addTarget(self, action: #selector(goToHome), for: .touchUpInside)
        return button
      }()

      view.addSubview(profileButton)
      view.addSubview(profileLabel)

      NSLayoutConstraint.activate([
        homeButton.bottomAnchor.constraint(equalTo: view.safeAreaLayoutGuide.bottomAnchor),
        homeButton.widthAnchor.constraint(equalTo: view.widthAnchor),
        homeButton.heightAnchor.constraint(equalToConstant: 72),
        homeLabel.centerXAnchor.constraint(equalTo: view.centerXAnchor),
        homeLabel.centerYAnchor.constraint(equalTo: view.centerYAnchor)
      ])

    }

    @objc func goToHome(){
      tabBarController?.selectedIndex = 0
    }

}
Звісно, код доволі повторюваний. Але для цілей цієї статті на це можна не зважати.
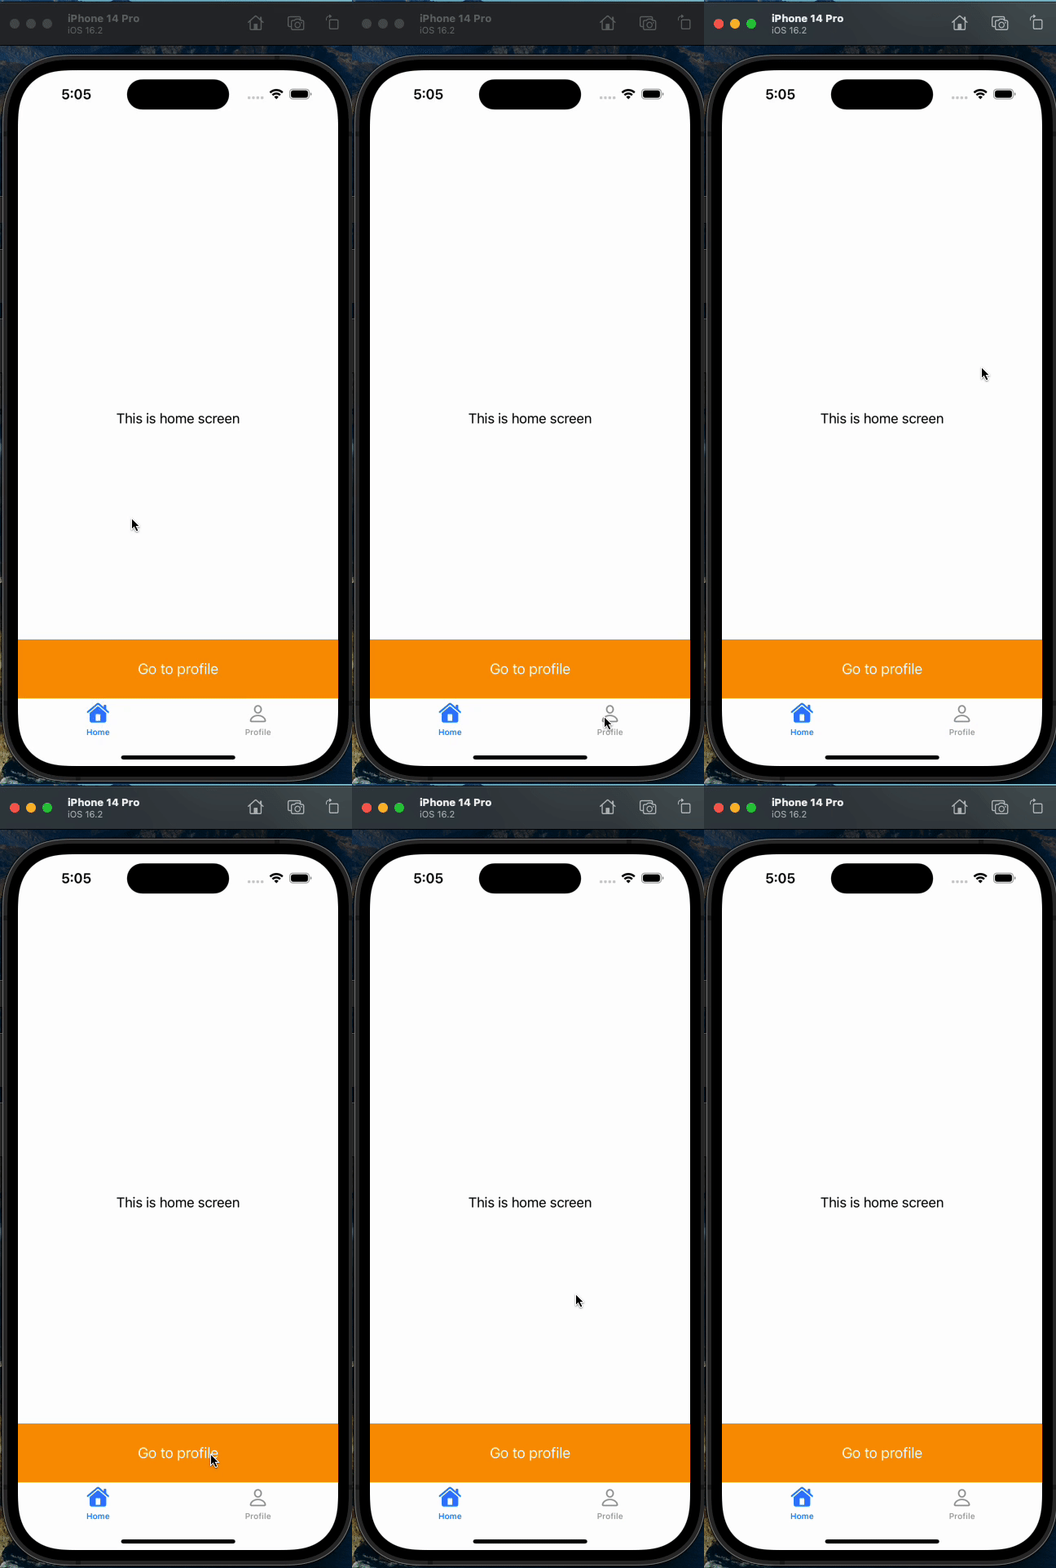
Ці два view controllers по суті однакові, різняться лише заголовками та діями кнопок. Обидва контролери показують по центру екрана мітку з назвою поточного екрана. Крім того, внизу екрана є кнопка, яка дозволяє переходити між вкладками. Ось і вся основна функціональність цих view controllers.
Що вийшло
Тепер у нас є повністю програмний застосунок із tab bar і navigation controller, без жодного storyboard!
Висновок
Отже, програмний підхід дає більше контролю над дизайном і масштабованістю застосунку і дозволяє розробникам зосередитися на програмуванні, а не покладатися лише на storyboards. Особливо це стосується проблем з IBAction/IBOutlet**. **Одна з проблем, що виникає під час рефакторингу коду зі змінними IBOutlet та IBAction, полягає в тому, що після змін зв'язки доводиться відновлювати. З мого досвіду, після кількох днів роботи з кодовою базою застосунок почав несподівано падати без жодного зрозумілого пояснення. Розібравшись, я з'ясував, що причиною були перейменовані змінні IBOutlet та IBAction. Щоразу, коли це траплялося, мені доводилося вручну заново підключати ці змінні, щоб вони знову працювали. Це забирає час, дратує і збиває робочий ритм.
Дякую, що дочитали!