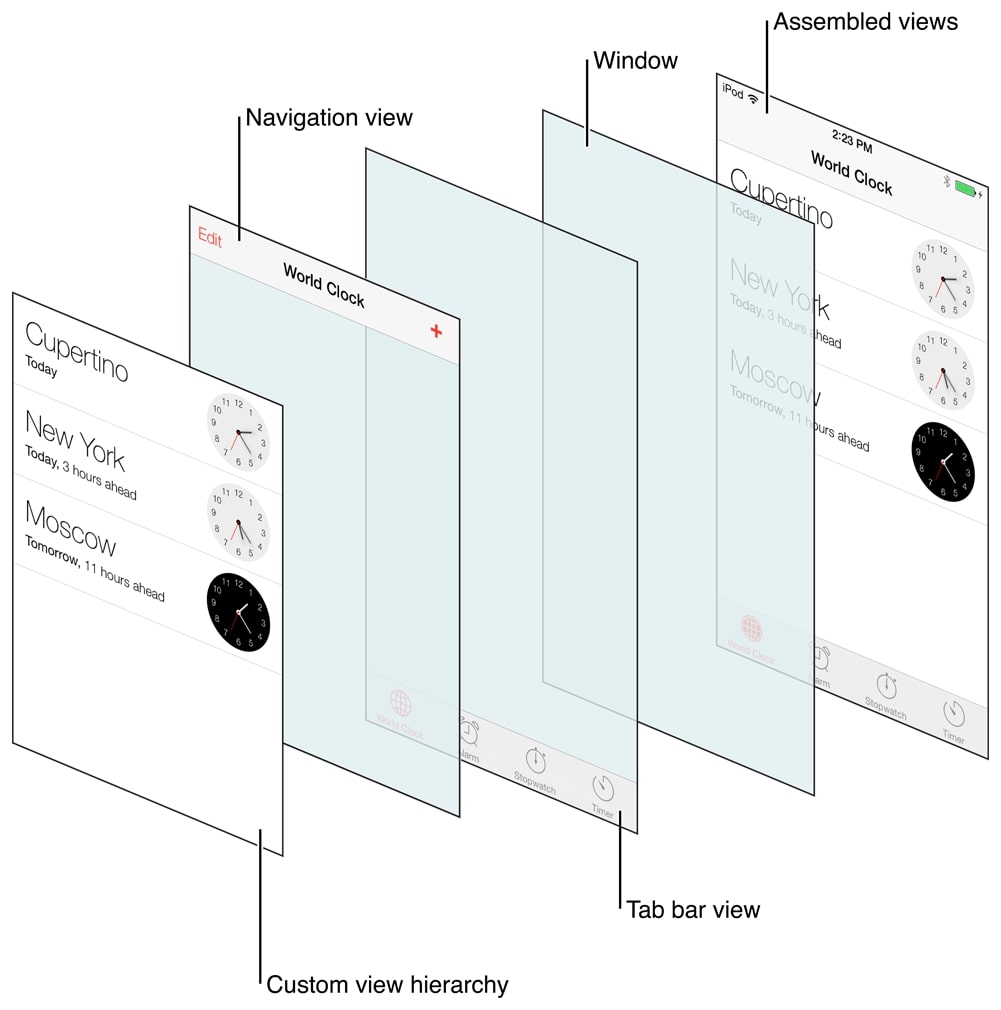
Als ik iOS-apps ontwikkel met UIKit, heb ik altijd de voorkeur gehad voor een programmatische aanpak. Storyboards lijken in het begin misschien handig, maar ze geven me eerder het gevoel dat ik een designer ben dan een programmeur. Bovendien vind ik de programmatische aanpak steeds weer beter als het gaat om schaalbaarheid en beheersbaarheid.
In dit artikel leg ik uit hoe je met UIKit een tab bar controller maakt in combinatie met een navigation controller.
SceneDelegate opzetten
De eerste stap in een programmatische aanpak is de rootcode van onze app aanpassen. Ik noem het "root", en het doet me denken aan App.js of index.js in React en React Native. Dit is het startpunt van onze app of scene. In iOS vinden we een scene-functie in de SceneDelegate-class, en die gebruiken we uitsluitend om onze app in te richten voor programmatische ontwikkeling.
Hieronder zie je de standaardstructuur van de SceneDelegate-class:
    import UIKit

    class SceneDelegate: UIResponder, UIWindowSceneDelegate {

      var window: UIWindow?


      func scene(_ scene: UIScene, willConnectTo session: UISceneSession, options connectionOptions: UIScene.ConnectionOptions) {
        // Use this method to optionally configure and attach the UIWindow `window` to the provided UIWindowScene `scene`.
        // If using a storyboard, the `window` property will automatically be initialized and attached to the scene.
        // This delegate does not imply the connecting scene or session are new (see `application:configurationForConnectingSceneSession` instead).
        guard let _ = (scene as? UIWindowScene) else { return }
      }

      func sceneDidDisconnect(_ scene: UIScene) {
        // Called as the scene is being released by the system.
        // This occurs shortly after the scene enters the background, or when its session is discarded.
        // Release any resources associated with this scene that can be re-created the next time the scene connects.
        // The scene may re-connect later, as its session was not necessarily discarded (see `application:didDiscardSceneSessions` instead).
      }

      func sceneDidBecomeActive(_ scene: UIScene) {
        // Called when the scene has moved from an inactive state to an active state.
        // Use this method to restart any tasks that were paused (or not yet started) when the scene was inactive.
      }

      func sceneWillResignActive(_ scene: UIScene) {
        // Called when the scene will move from an active state to an inactive state.
        // This may occur due to temporary interruptions (ex. an incoming phone call).
      }

      func sceneWillEnterForeground(_ scene: UIScene) {
        // Called as the scene transitions from the background to the foreground.
        // Use this method to undo the changes made on entering the background.
      }

      func sceneDidEnterBackground(_ scene: UIScene) {
        // Called as the scene transitions from the foreground to the background.
        // Use this method to save data, release shared resources, and store enough scene-specific state information
        // to restore the scene back to its current state.
      }
    }
We passen alleen de functie hieronder aan:
func scene(_ scene: UIScene, willConnectTo session: UISceneSession, options connectionOptions: UIScene.ConnectionOptions) {
    // Use this method to optionally configure and attach the UIWindow `window` to the provided UIWindowScene `scene`.
    // If using a storyboard, the `window` property will automatically be initialized and attached to the scene.
    // This delegate does not imply the connecting scene or session are new (see `application:configurationForConnectingSceneSession` instead).
    guard let _ = (scene as? UIWindowScene) else { return }
  }
De scene-functie in SceneDelegate aanpassen
In de volgende code zorgen we er met het guard-statement voor dat we de windowScene veilig ophalen. Daarna wijzen we deze windowScene toe aan de window-property, die in de SceneDelegate-class is gedefinieerd. Tot slot roepen we de methode makeKeyAndVisible aan om het window het key window te maken.
var window: UIWindow?

func scene(\_ scene: UIScene, willConnectTo session: UISceneSession, options connectionOptions: UIScene.ConnectionOptions) {
guard let windowScene = (scene as? UIWindowScene) else { return }
window?.windowScene = windowScene
window?.makeKeyAndVisible()
}
Laten we ons nu richten op het maken van de tab bar controller. Deze controller beheert de view controllers voor elke tab in onze app. Als we bijvoorbeeld twee tabs hebben, hebben we twee aparte navigation controllers nodig. Maar waarom kiezen we voor navigation controllers? Omdat we binnen elke tab een eigen navigation controller willen hebben. Neem de tab "Profile" als voorbeeld. Het profielscherm wordt de hoofdview van die tab, maar misschien zijn er binnen de tab nog meer views waartussen we willen navigeren. Daarom gebruiken we voor elk tab-item een navigation controller. Die biedt de functionaliteit om soepel te navigeren tussen verschillende view controllers binnen een tab.
Tijd om dit te coderen!
 func scene(_ scene: UIScene, willConnectTo session: UISceneSession, options connectionOptions: UIScene.ConnectionOptions) {
    guard let windowScene = (scene as? UIWindowScene) else { return }
    window?.windowScene = windowScene
    window?.makeKeyAndVisible()

    let tabbar = UITabBarController()

    let firstVC = UINavigationController(rootViewController: ViewController())
    let secondVC = UINavigationController(rootViewController: SecondViewController())


    firstVC.tabBarItem = UITabBarItem(title: "Home", image: UIImage(systemName: "house"),selectedImage: UIImage(systemName: "house.fill"))

    secondVC.tabBarItem = UITabBarItem(title: "Profile", image: UIImage(systemName: "person"),selectedImage: UIImage(systemName: "person.fill"))

    tabbar.viewControllers = [firstVC, secondVC]

    window?.rootViewController = tabbar

  }
Nadat we onze tab bar controller hebben geïnitialiseerd, maken we twee navigation controllers, die horen bij de twee tab-items in onze app. De eerste view controller is de standaard view controller, en de tweede, SecondViewController, komt in het volgende deel aan bod. SecondViewController is een gewone view controller, vergelijkbaar met de standaard view controller.
Om de tab-items in te stellen, geven we de property tabItem van elke navigation controller een waarde met UITabBarItem.
Tot slot wijzen we de gemaakte view controllers toe aan de property viewControllers van de tab bar controller.
En de belangrijkste stap is de rootViewController van het window instellen op onze tab bar controller. Zo zorgen we ervoor dat de tab bar, samen met de navigation controllers binnen elk tab-item, bovenaan de hiërarchie van onze app staat.
View controllers in actie
Laten we eens kijken naar onze ViewController-class hieronder:
class ViewController: UIViewController {

    override func viewDidLoad() {
      super.viewDidLoad()
      setupUI()
    }

    func setupUI(){
      view.backgroundColor = .white

      let homeLabel: UILabel = {
        let label = UILabel()
        label.text = "This is home screen"
        label.translatesAutoresizingMaskIntoConstraints = false
        return label
      }()

      let homeButton: UIButton = {
        let button = UIButton()
        button.setTitle("Go to profile", for: .normal)
        button.setTitleColor(.white, for: .normal)
        button.backgroundColor = .systemOrange
        button.translatesAutoresizingMaskIntoConstraints = false
        button.addTarget(self, action: #selector(goToProfile), for: .touchUpInside)
        return button
      }()

      view.addSubview(homeButton)
      view.addSubview(homeLabel)


      NSLayoutConstraint.activate([
        homeButton.bottomAnchor.constraint(equalTo: view.safeAreaLayoutGuide.bottomAnchor),
        homeButton.widthAnchor.constraint(equalTo: view.widthAnchor),
        homeButton.heightAnchor.constraint(equalToConstant: 72),
        homeLabel.centerXAnchor.constraint(equalTo: view.centerXAnchor),
        homeLabel.centerYAnchor.constraint(equalTo: view.centerYAnchor)
      ])

    }

    @objc func goToProfile(){
      tabBarController?.selectedIndex = 1
    }

}
En SecondViewController (ja, ik weet het, slechte naamgeving hier…)

class SecondViewController: UIViewController {
override func viewDidLoad() {
super.viewDidLoad()
setupUI()
}

    func setupUI(){
      view.backgroundColor = .white

      let profileLabel: UILabel = {
        let label = UILabel()
        label.translatesAutoresizingMaskIntoConstraints = false
        label.text = "This is profile screen"
        return label
      }()

      let profileButton: UIButton = {
        let button = UIButton()
        button.setTitle("Go to home", for: .normal)
        button.setTitleColor(.white, for: .normal)
        button.backgroundColor = .systemOrange
        button.translatesAutoresizingMaskIntoConstraints = false
        button.addTarget(self, action: #selector(goToHome), for: .touchUpInside)
        return button
      }()

      view.addSubview(profileButton)
      view.addSubview(profileLabel)

      NSLayoutConstraint.activate([
        homeButton.bottomAnchor.constraint(equalTo: view.safeAreaLayoutGuide.bottomAnchor),
        homeButton.widthAnchor.constraint(equalTo: view.widthAnchor),
        homeButton.heightAnchor.constraint(equalToConstant: 72),
        homeLabel.centerXAnchor.constraint(equalTo: view.centerXAnchor),
        homeLabel.centerYAnchor.constraint(equalTo: view.centerYAnchor)
      ])

    }

    @objc func goToHome(){
      tabBarController?.selectedIndex = 0
    }

}
De code is natuurlijk behoorlijk repetitief. Maar voor dit artikel kunnen we dat negeren.
Deze twee view controllers zijn in wezen identiek, op hun titels en knopacties na. Beide controllers renderen vooral een label in het midden van het scherm met de naam van het huidige scherm. Daarnaast hebben ze een knop onderaan het scherm waarmee je tussen de tab-items kunt navigeren. Dat is in een notendop wat deze view controllers doen.
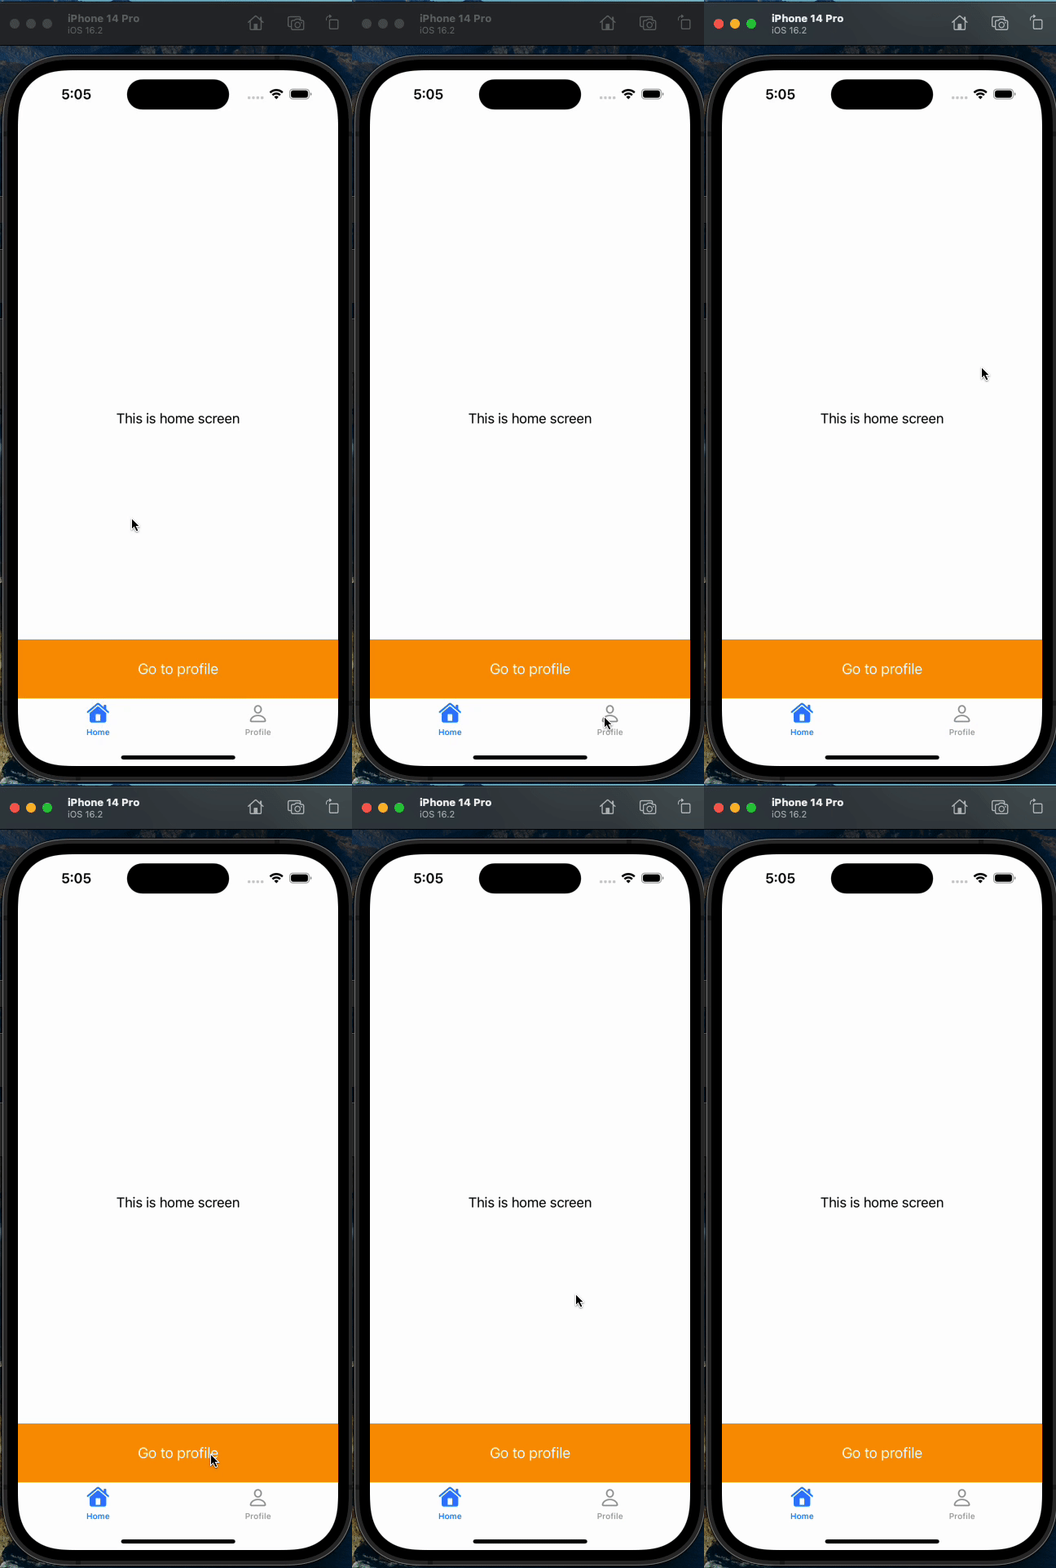
Het eindbeeld
We hebben nu een volledig programmatische app met een tab bar en navigation controller, zonder ook maar één storyboard!
Conclusie
Kortom, een programmatische aanpak geeft je meer controle over het ontwerp en de schaalbaarheid van de app, zodat developers zich op het programmeren kunnen richten in plaats van alleen op storyboards te leunen. Vooral bij problemen met IBAction en IBOutlet**. **Een specifiek probleem dat opduikt bij het refactoren van code met IBOutlet- en IBAction-variabelen, is dat je na wijzigingen de verbindingen opnieuw moet leggen. In mijn ervaring kreeg ik na een paar dagen werken aan de codebase onverwachte crashes in de app, zonder duidelijke verklaring. Bij nader onderzoek ontdekte ik dat de crashes werden veroorzaakt door hernoemde IBOutlet- en IBAction-variabelen. Elke keer dat dit gebeurde, moest ik de betreffende variabelen handmatig opnieuw verbinden om ze weer werkend te krijgen. Dat kan een tijdrovend en frustrerend proces zijn dat je ontwikkelworkflow verstoort.
Bedankt voor het lezen!