한 단계 높은 React Native 폼 처리
Zod와 React Hook Form으로 React Native의 폼 처리 개선하기
폼 처리는 사용자 입력이 필요한 모든 앱의 기본이며, 적절한 도구와 라이브러리만 있으면 간단하고 매끄럽게 처리할 수 있습니다. 이 글에서는 react-hook-form과 zod를 사용해 React Native 앱에서 폼을 처리하는 방법을 안내합니다. 두 라이브러리를 조합하면 효율적인 폼 처리 구조를 만들 수 있습니다. 이를 보여 주기 위해 기본적인 회원가입 폼을 만들어 봅시다.
전체 소스 코드는 글 마지막에 있습니다.
Zod로 스키마 선언하기
먼저 zod로 스키마를 선언합니다. 이 스키마는 폼 데이터가 어떤 모양이어야 하는지 정하고 각 필드의 유효성 검사를 설정합니다. Zod는 이런 규칙을 정의할 수 있는 강력한 검증 함수를 많이 제공합니다.
전체 zod 스키마는 다음과 같습니다.
이 글은 독자가 zod의 기초를 알고 있다고 가정합니다.
import z from "zod";

const phoneNumberRegexp = new RegExp(
  /^[\+]?([0-9][\s]?|[0-9]?)([(][0-9]{3}[)][\s]?|[0-9]{3}[-\s\.]?)[0-9]{3}[-\s\.]?[0-9]{4,6}$/im
);
const FIELD_REQUIRED_STR = "This field is required";
export const GENDER_OPTIONS = ["Male", "Female", "Other"] as const;

export const signUpFormSchema = z.object({
  name: z
    .string({
      invalid_type_error: "Name must be a string",
      required_error: FIELD_REQUIRED_STR,
    })
    .min(3, "Minimum 3 characters")
    .max(20, "Maximum 20 characters")
    .trim(),

  surname: z
    .string({
      invalid_type_error: "Surname must be a string",
      required_error: FIELD_REQUIRED_STR,
    })
    .min(3, "Minimum 3 characters")
    .max(20, "Maximum 20 characters")
    .trim(),

  phoneNumber: z
    .string({
      invalid_type_error: "Phone number must be a number",
      required_error: FIELD_REQUIRED_STR,
    })
    .regex(phoneNumberRegexp, "Invalid phone number"),

  email: z
    .string({
      invalid_type_error: "Email must be a string",
      required_error: FIELD_REQUIRED_STR,
    })
    .email("Email is invalid"),

  gender: z.enum(GENDER_OPTIONS, {
    required_error: FIELD_REQUIRED_STR,
    invalid_type_error: `Invalid gender, must be one of the followings: ${GENDER_OPTIONS.join(
      ", "
    )}`,
  }),

  birthDate: z
    .date({
      invalid_type_error: "Birth date must be a date",
      required_error: FIELD_REQUIRED_STR,
    })
    .min(new Date("1900-01-01"), "Invalid date time, too old")
    .max(new Date("2023-01-01"), "Invalid date time, too young")
    .default(new Date()),
});

export type SignUpFormSchema = z.infer<typeof signUpFormSchema>;
이 스키마에서는 zod로 각 필드에 무엇이 들어가야 하는지 지정합니다. 예를 들어 name과 surname 필드는 3자에서 20자 사이의 문자열이어야 하고, phoneNumber 필드는 숫자여야 합니다.
일부 필드에는 더 복잡한 규칙도 있습니다. 예를 들어 email 필드는 문자열이어야 하고, 유효한 이메일 주소만 허용됩니다. gender 필드는 미리 정해 둔 성별 옵션('Male', 'Female', 'Other') 중 하나여야 합니다.
마지막으로 birthDate 필드는 date 타입이며 1900-01-01과 2023-01-01 사이의 유효한 날짜여야 합니다. 값이 주어지지 않으면 기본으로 현재 날짜를 씁니다.
zod를 쓰면 복잡한 검증 규칙도 쉽게 만들 수 있습니다. 이렇게 하면 폼에서 받는 데이터가 우리가 기대하는 모양과 일치한다고 보장할 수 있습니다.
다음 단계는 스키마의 타입을 추론하는 것입니다. Zod는 주어진 zod 스키마에서 TypeScript 타입을 만들어 내는 infer 메서드를 제공합니다.
export type SignUpFormSchema = z.infer<typeof signUpFormSchema>;
이렇게 추론한 타입은 나중에 useForm에서 폼 데이터가 스키마와 일치하도록 보장하는 데 쓰입니다.
React Hook Form으로 폼 설정하기
다음으로 'react-hook-form'의 useForm 훅으로 폼을 설정합니다. 이 훅은 폼 검증을 처리하기 위해 zod 스키마를 (zodResolver를 통해) 인자로 받습니다.
const methods = useForm<SignUpFormSchema>({
  resolver: zodResolver(signUpFormSchema),
  defaultValues: {
    birthDate: new Date(),
  },
  mode: "onBlur",
});
resolver에는 스키마를 넘깁니다. defaultValues 프로퍼티로는 폼 필드의 기본값을 지정할 수 있습니다. 여기서는 birthDate의 기본값을 현재 날짜로 설정합니다. mode 프로퍼티는 검증이 언제 일어날지 정합니다. 여기서는 onBlur, 즉 사용자가 필드에서 벗어날 때 검증합니다.
필드 렌더링과 검증
각 폼 필드는 react-hook-form의 Controller 컴포넌트로 관리합니다. Controller는 field와 fieldState props를 제공하며, 이것으로 필드의 값, 에러 상태, 검증을 관리합니다.
예를 들어 name 필드는 이렇게 설정합니다.
<Controller
  control={methods.control}
  name="name"
  render={({ field: { onChange, onBlur, value }, fieldState: { error } }) => {
    return (
      <TextInput
        label="Name"
        onBlur={onBlur}
        value={value}
        onChangeText={onChange}
        errorMessage={error?.message}
      />
    );
  }}
/>
각 prop이 하는 일은 다음과 같습니다.
-
control: useForm 훅의 control prop을 넘기는 곳입니다. Controller가 폼 상태와 상호작용하려면 꼭 필요합니다.
-
name: 폼 안에서 입력값에 접근하는 키입니다. 폼 값을 가져오거나 설정할 때 이 키가 쓰입니다. 모든 폼 필드에서 고유해야 합니다.
-
render: 입력 요소를 반환하는 함수입니다. 이 함수는 field와 fieldState props를 제공합니다.
-
field: onChange, onBlur, value props를 담고 있습니다. 이것들은 제어 컴포넌트에 직접 연결해야 합니다. 여기서는 onChange가 TextInput의 onChangeText에 연결되어 사용자의 입력을 받아 폼 상태에 저장합니다.
-
fieldState: 이 필드의 검증 에러 정보를 알려 주는 error prop이 들어 있습니다.
render prop 안에서 TextInput을 원하는 대로 구성합니다. onBlur와 onChangeText는 field의 해당 메서드에 연결되고, value prop은 이 입력의 현재 폼 값에 연결됩니다. errorMessage prop은 검증에 실패했을 때의 에러 메시지에 연결됩니다.
그래서 폼을 제출할 때나 실시간으로 검증할 때 'name' 필드가 Zod 스키마에 정의된 검증 조건을 만족하지 못하면, 이 TextInput 필드에 에러 메시지가 표시됩니다.
React Hook Form으로 직접 검증 실행하기
날짜 선택 컴포넌트(여기서는 RNDateTimePicker)를 쓰는 birthDate 필드에서는 특별한 상황이 생깁니다. 사용자가 날짜 선택기와 상호작용하는 방식이 일반 텍스트 입력과 다르기 때문에 검증 과정을 따로 처리해야 합니다.
<Controller
  control={methods.control}
  name="birthDate"
  render={({ field: { onChange, onBlur, value }, fieldState: { error } }) => {
    return (
      <View>
        <Text>Birth date</Text>
        <RNDateTimePicker
          value={value}
          mode="date"
          onChange={(e) => {
            if (e.type === "set" && e.nativeEvent.timestamp) {
              onChange(new Date(e.nativeEvent.timestamp));
              methods.trigger("birthDate");
            }
          }}
        />
        {!!error?.message && <Text>{error.message}</Text>}
      </View>
    );
  }}
/>
사용자가 날짜를 선택하면 onChange 이벤트가 발생합니다. 이 이벤트 핸들러 안에서 먼저 이벤트 타입이 사용자가 날짜를 설정했음을 뜻하는 'set'인지 확인합니다. 그다음 날짜가 실제로 선택되었는지 확인하기 위해 timestamp가 있는지 확인합니다.
이 조건들이 확인되면 new Date(e.nativeEvent.timestamp)로 timestamp를 JavaScript Date 객체로 변환합니다. 그리고 이 새 값을 onChange에 넘겨 폼의 birthDate 필드 값을 업데이트합니다.
그런데 값이 바뀌면 자동으로 검증이 실행되는 일반 텍스트 입력과 달리, 날짜 선택기는 같은 방식으로 검증을 실행하지 않습니다. 그래서 값을 업데이트한 뒤 직접 검증을 실행해야 합니다. methods.trigger('birthDate')를 호출하면 됩니다.
react-hook-form이 제공하는 trigger 메서드는 특정 필드의 검증을 시작합니다. 여기서는 날짜가 설정되자마자 birthDate 필드의 검증을 실행해 검증 규칙이 즉시 적용되도록 합니다.
마지막으로 검증 에러가 있으면 {!!error?.message &&
폼 제출: React Hook Form
react-hook-form 패키지는 폼 제출과 에러 처리를 위한 효율적인 메서드를 제공합니다.
const onSubmit: SubmitHandler<SignUpFormSchema> = (data) => {
  console.log(JSON.stringify(data));
};

const onError: SubmitErrorHandler<SignUpFormSchema> = (errors, e) => {
  console.log(JSON.stringify(errors));
};

<Button
  onPress={methods.handleSubmit(onSubmit, onError)}
  title="Submit Form"
  color={"#007BFF"}
/>;
과정을 나눠서 살펴봅시다.
onSubmit 핸들러는 폼 데이터를 인자로 받습니다. 이 예제에서는 데이터를 로그로 출력하기만 하지만, 실제 앱에서는 서버로 보내거나 앱의 필요에 따라 더 가공할 수 있습니다.
반면 onError 함수는 폼을 제출할 때 검증 에러가 있으면 호출됩니다. errors 객체에는 검증에 실패한 모든 필드에 대한 자세한 정보가 들어 있습니다. 이 예제에서는 이 에러들을 로그로 출력하기만 합니다.
모든 필드에 에러가 있다면 error 객체는 다음과 같습니다.
    {
      "name": {
        "message": "This field is required",
        "type": "invalid_type",
        "ref": {
          "name": "name"
        }
      },
      "surname": {
        "message": "This field is required",
        "type": "invalid_type",
        "ref": {
          "name": "surname"
        }
      },
      "phoneNumber": {
        "message": "This field is required",
        "type": "invalid_type",
        "ref": {
          "name": "phoneNumber"
        }
      },
      "email": {
        "message": "This field is required",
        "type": "invalid_type",
        "ref": {
          "name": "email"
        }
      },
      "gender": {
        "message": "This field is required",
        "type": "invalid_type",
        "ref": {
          "name": "gender"
        }
      },
      "birthDate": {
        "message": "Invalid date time, too young",
        "type": "too_big",
        "ref": {
          "name": "birthDate"
        }
      }
    }
Zod로 사전 검증하기
아래 코드는 폼 제출 이벤트 전에 Zod의 safeParse 메서드로 폼 데이터를 직접 사전 검증하는 방식을 보여 줍니다. 폼 검증은 이미 React Hook Form의 handleSubmit 메서드가 처리하고 있지만, 사전 검증을 하면 개발자가 검증 과정을 더 세밀하게 제어할 수 있습니다.
<Button
  title="Submit Form"
  onPress={() => {
    // get current form values
    const currFormValues = methods.getValues();

    // Prevalidate using zod's safeParse
    const result = signUpFormSchema.safeParse(currFormValues);

    // If prevalidation is failed, display the error
    if (!result.success) {
      Alert.alert(JSON.stringify(result.error));
    } else {
      // If prevalidation is successful, notify the user
      Alert.alert("Validation is successful with zod");
    }
  }}
/>
위 코드를 분석해 봅시다.
-
Button의 onPress 이벤트로 폼 제출 전에 사전 검증을 하는 함수를 실행합니다.
-
methods(React Hook Form이 제공)의 getValues 메서드로 현재 폼 값을 가져옵니다.
-
그런 다음 이 값들을 signUpFormSchema(처음에 만든 zod 스키마)의 safeParse 메서드에 넘깁니다. 이 단계에서 zod 사전 검증이 일어납니다. zod의 parse 메서드와 달리 safeParse는 검증에 실패해도 에러를 던지지 않습니다. 대신 success boolean과, 검증에 실패했다면 error 객체를 담은 객체를 반환합니다.
-
조건문으로 result.success가 false인지(검증 실패) 확인합니다. false라면 검증 에러를 보여 주는 alert를 띄웁니다.
-
result.success가 true라면(검증 성공) zod 검증에 성공했다는 alert를 띄웁니다.
React Hook Form의 handleSubmit이 이미 zod로 제공한 스키마를 사용해 폼을 검증하므로 이 방식이 중복처럼 보일 수도 있지만, 특정 상황에서는 여전히 유용합니다. 예를 들어 직접 검증한 뒤에만 어떤 동작을 수행하고 싶을 수도 있고, 사용자가 폼을 채우는 동안 실시간으로 입력을 검증하고 싶을 수도 있습니다. 그런 경우 zod의 safeParse 메서드를 이용한 사전 검증이 꽤 유용합니다.
zod의 error 객체는 이런 모습입니다.
    {
      "issues": [
        {
          "code": "invalid_type",
          "expected": "string",
          "received": "undefined",
          "path": [
            "name"
          ],
          "message": "This field is required"
        },
        {
          "code": "invalid_type",
          "expected": "string",
          "received": "undefined",
          "path": [
            "surname"
          ],
          "message": "This field is required"
        },
        {
          "code": "invalid_type",
          "expected": "string",
          "received": "undefined",
          "path": [
            "phoneNumber"
          ],
          "message": "This field is required"
        },
        {
          "code": "invalid_type",
          "expected": "string",
          "received": "undefined",
          "path": [
            "email"
          ],
          "message": "This field is required"
        },
        {
          "expected": "'Male' | 'Female' | 'Other'",
          "received": "undefined",
          "code": "invalid_type",
          "path": [
            "gender"
          ],
          "message": "This field is required"
        },
        {
          "code": "too_big",
          "message": "Invalid date time, too young",
          "inclusive": true,
          "exact": false,
          "maximum": 1672531200000,
          "type": "date",
          "path": [
            "birthDate"
          ]
        }
      ],
      "name": "ZodError"
    }
정말 큰 객체이고, 우리 경우에는 불필요한 필드도 있을 수 있습니다. 다행히 zod는 에러 포맷팅 메서드를 제공합니다.
result.error.format()을 쓰기만 하면 나머지는 zod가 내부에서 처리합니다.
if (!result.success) {
  // Format errors using result.error.format()
  const formattedError = result.error.format();
  Alert.alert(JSON.stringify(formattedError));
} else {
  Alert.alert("Validation is successful with zod");
}
포맷팅된 error 객체는 다음과 같습니다.
    {
      "name": {
        "_errors": [
          "This field is required"
        ]
      },
      "surname": {
        "_errors": [
          "This field is required"
        ]
      },
      "phoneNumber": {
        "_errors": [
          "This field is required"
        ]
      },
      "email": {
        "_errors": [
          "This field is required"
        ]
      },
      "gender": {
        "_errors": [
          "This field is required"
        ]
      },
      "birthDate": {
        "_errors": [
          "Invalid date time, too young"
        ]
      }
    }
최신 코드
다음은 최신 코드입니다(import와 스타일 제외). 전체 소스 코드를 보고 싶다면 글 마지막을 참고하세요.
// imports...

export const SignupForm: React.FC = () => {
  const [shouldValidateWithZod, setShouldValidateWithZod] =
    React.useState<boolean>(false);

  const [isCalendarOpenForAndroid, setIsCalendarOpenForAndroid] =
    React.useState<boolean>(false);

  const methods = useForm<SignUpFormSchema>({
    resolver: zodResolver(signUpFormSchema),
    defaultValues: {
      birthDate: new Date(),
    },
    mode: "onBlur",
  });

  const onSubmit: SubmitHandler<SignUpFormSchema> = (data) => {
    console.log(JSON.stringify(data));
  };

  const onError: SubmitErrorHandler<SignUpFormSchema> = (errors, e) => {
    console.log(JSON.stringify(errors));
    Alert.alert("Warning", getReadableValidationErrorMessage(errors));
  };

  return (
    <SafeAreaView edges={["top", "bottom"]} style={styles.safeArea}>
      <ScrollView>
        <Text style={styles.title}>Sign Up Form</Text>
        <View style={styles.root}>
          <FormProvider {...methods}>
            <Controller
              control={methods.control}
              name="name"
              render={({
                field: { onChange, onBlur, value },
                fieldState: { error },
              }) => {
                return (
                  <TextInput
                    label="Name"
                    onBlur={onBlur}
                    value={value}
                    onChangeText={onChange}
                    errorMessage={error?.message}
                  />
                );
              }}
            />
            <View style={styles.spacing} />
            <Controller
              control={methods.control}
              name="surname"
              render={({
                field: { onChange, onBlur, value },
                fieldState: { error },
              }) => {
                return (
                  <TextInput
                    label="Surname"
                    onBlur={onBlur}
                    value={value}
                    onChangeText={onChange}
                    errorMessage={error?.message}
                  />
                );
              }}
            />
            <View style={styles.spacing} />

            <Controller
              control={methods.control}
              name="email"
              render={({
                field: { onChange, onBlur, value },
                fieldState: { error },
              }) => {
                return (
                  <TextInput
                    label="Email"
                    onBlur={onBlur}
                    value={value}
                    onChangeText={onChange}
                    errorMessage={error?.message}
                  />
                );
              }}
            />

            <View style={styles.spacing} />

            <Controller
              control={methods.control}
              name="phoneNumber"
              render={({
                field: { onChange, onBlur, value },
                fieldState: { error },
              }) => {
                return (
                  <TextInput
                    label="Phone number"
                    onBlur={onBlur}
                    keyboardType="decimal-pad"
                    value={value}
                    onChangeText={(val) => onChange(val.toString())}
                    errorMessage={error?.message}
                  />
                );
              }}
            />

            <View style={styles.spacing} />

            <Controller
              control={methods.control}
              name="birthDate"
              render={({
                field: { onChange, value },
                fieldState: { error },
              }) => {
                return (
                  <View style={styles.dateWrapper}>
                    <Text style={styles.label}>Birth date</Text>

                    {Platform.OS === "android" && (
                      <Button
                        onPress={() => {
                          setIsCalendarOpenForAndroid(true);
                        }}
                        title={value.toString()}
                      />
                    )}

                    {(isCalendarOpenForAndroid ||
                      Platform.OS !== "android") && (
                      <RNDateTimePicker
                        value={value}
                        style={styles.dateTimePicker}
                        mode={"date"}
                        onChange={(e) => {
                          if (Platform.OS === "android") {
                            setIsCalendarOpenForAndroid(false);
                          }

                          if (e.type === "set" && e.nativeEvent.timestamp) {
                            onChange(new Date(e.nativeEvent.timestamp));
                            methods.trigger("birthDate");
                          }
                        }}
                      />
                    )}

                    {!!error?.message && (
                      <Text style={styles.errorMessageText}>
                        {error.message}
                      </Text>
                    )}
                  </View>
                );
              }}
            />

            <View style={styles.spacing} />

            <Controller
              control={methods.control}
              name="gender"
              render={({
                field: { onChange, onBlur, value, ref },
                fieldState: { error },
              }) => {
                return (
                  <View style={styles.genderWrapper}>
                    <Text style={styles.label}>Gender</Text>
                    <View style={styles.genderOptionsWrapper}>
                      {GENDER_OPTIONS.map((genderOption) => (
                        <Pressable
                          key={genderOption}
                          style={[
                            styles.genderOptionPressable,
                            {
                              backgroundColor:
                                value === genderOption ? "#007BFF" : "#F2F2F2",
                            },
                          ]}
                          onPress={() => onChange(genderOption)}
                        >
                          <Text
                            style={[
                              styles.genderOptionText,
                              {
                                color: value === genderOption ? "#fff" : "#000",
                              },
                            ]}
                          >
                            {genderOption}
                          </Text>
                        </Pressable>
                      ))}
                    </View>
                    {!!error?.message && (
                      <Text style={styles.errorMessageText}>
                        {error.message}
                      </Text>
                    )}
                  </View>
                );
              }}
            />

            <View style={styles.spacing} />

            <Text style={styles.label}>Should validate with zod</Text>

            <Switch
              value={shouldValidateWithZod}
              onChange={(e) => setShouldValidateWithZod(e.nativeEvent.value)}
            />
            <View style={styles.spacing} />

            <Button
              onPress={
                shouldValidateWithZod
                  ? () => {
                      /** we could also prevalidate using zod like below */

                      // get current form values
                      const currFormValues = methods.getValues();
                      // https://zod.dev/?id=safeparse
                      const result = signUpFormSchema.safeParse(currFormValues);

                      if (!result.success) {
                        const formattedError = result.error.format();
                        Alert.alert(JSON.stringify(formattedError));
                      } else {
                        Alert.alert("Validation is successful with zod");
                      }
                    }
                  : methods.handleSubmit(onSubmit, onError)
              }
              title="Submit Form"
              color={"#007BFF"}
            />
          </FormProvider>
        </View>
      </ScrollView>
    </SafeAreaView>
  );
};

// styles...
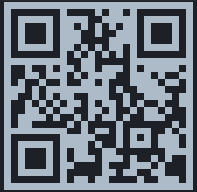
이 예제 앱은 Expo Go로 작성되었습니다. 즉 아래 QR 코드로 쉽게 테스트해 볼 수 있습니다! (QR 코드가 동작하지 않으면 글 마지막의 소스 코드 링크를 참고하세요.)
마치며
이 글에서는 React Hook Form, Zod, TypeScript를 함께 활용해 React Native 앱에서 탄탄한 폼 검증을 만드는 방법을 살펴봤습니다. 이 라이브러리들의 유연함과 강력함 덕분에 복잡한 검증 요구 사항도 처리할 수 있는 깔끔하고 타입 안전한 코드를 만들 수 있다는 것을 확인했습니다.
React Hook Form과 Zod를 함께 쓰면 두 라이브러리의 장점을 모두 누릴 수 있습니다. React Hook Form은 폼 처리를 단순하게 만들고, 리렌더링을 최적화하며, 폼 상태 관리와 에러 처리 같은 기능을 제공합니다. 반면 Zod는 각 폼 필드에 어떤 데이터가 허용되는지 지정하고 그 규칙을 강제할 수 있게 해 주어 안전성을 한 겹 더해 줍니다.
여기서 보여 드린 기법은 간단한 회원가입 폼을 예로 들었지만, React Native 앱의 모든 폼 기반 사용자 입력에 적용할 수 있다는 점을 기억하세요. 이 전략들을 활용하면 사용하기 쉽고, 탄탄하고, 유지보수하기 좋은 폼을 만들 수 있고, 결과적으로 더 나은 사용자 경험과 더 견고한 앱으로 이어집니다.