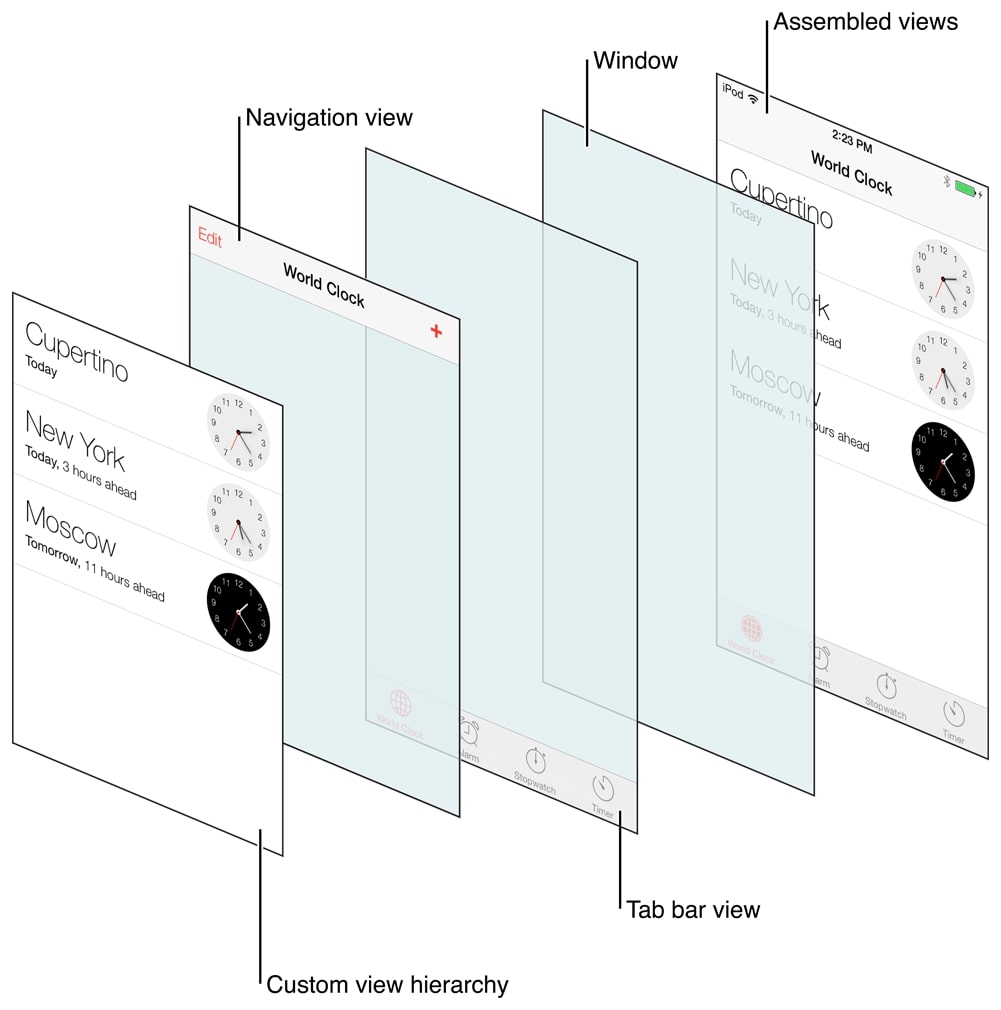
UIKitでiOSのモバイルアプリを開発するとき、私はいつもコードでUIを組み立てるアプローチを好んできました。storyboardは最初は便利に見えるかもしれませんが、プログラマーというよりデザイナーになった気分にさせられます。さらに、スケーラビリティと管理のしやすさという点では、コードで組み立てるアプローチのほうが一貫して優れていると感じています。
この記事では、UIKitを使って、navigation controllerと組み合わせたtab bar controllerを作る手順を詳しく説明します。
SceneDelegateのセットアップ
コードで組み立てるアプローチを採用する最初のステップは、アプリケーションのルートのコードを変更することです。私はこれを「ルート」と呼んでいて、React/React NativeのApp.jsやindex.jsを思い出します。これはアプリケーション、つまりシーンのエントリーポイントになります。iOSでは、SceneDelegateクラスの中にscene関数があり、アプリケーションをコードで開発できるように設定するためだけに、これを使います。
以下がSceneDelegateクラスのデフォルトの構造です。
    import UIKit

    class SceneDelegate: UIResponder, UIWindowSceneDelegate {

      var window: UIWindow?


      func scene(_ scene: UIScene, willConnectTo session: UISceneSession, options connectionOptions: UIScene.ConnectionOptions) {
        // Use this method to optionally configure and attach the UIWindow `window` to the provided UIWindowScene `scene`.
        // If using a storyboard, the `window` property will automatically be initialized and attached to the scene.
        // This delegate does not imply the connecting scene or session are new (see `application:configurationForConnectingSceneSession` instead).
        guard let _ = (scene as? UIWindowScene) else { return }
      }

      func sceneDidDisconnect(_ scene: UIScene) {
        // Called as the scene is being released by the system.
        // This occurs shortly after the scene enters the background, or when its session is discarded.
        // Release any resources associated with this scene that can be re-created the next time the scene connects.
        // The scene may re-connect later, as its session was not necessarily discarded (see `application:didDiscardSceneSessions` instead).
      }

      func sceneDidBecomeActive(_ scene: UIScene) {
        // Called when the scene has moved from an inactive state to an active state.
        // Use this method to restart any tasks that were paused (or not yet started) when the scene was inactive.
      }

      func sceneWillResignActive(_ scene: UIScene) {
        // Called when the scene will move from an active state to an inactive state.
        // This may occur due to temporary interruptions (ex. an incoming phone call).
      }

      func sceneWillEnterForeground(_ scene: UIScene) {
        // Called as the scene transitions from the background to the foreground.
        // Use this method to undo the changes made on entering the background.
      }

      func sceneDidEnterBackground(_ scene: UIScene) {
        // Called as the scene transitions from the foreground to the background.
        // Use this method to save data, release shared resources, and store enough scene-specific state information
        // to restore the scene back to its current state.
      }
    }
更新するのは、次の関数だけです。
func scene(_ scene: UIScene, willConnectTo session: UISceneSession, options connectionOptions: UIScene.ConnectionOptions) {
    // Use this method to optionally configure and attach the UIWindow `window` to the provided UIWindowScene `scene`.
    // If using a storyboard, the `window` property will automatically be initialized and attached to the scene.
    // This delegate does not imply the connecting scene or session are new (see `application:configurationForConnectingSceneSession` instead).
    guard let _ = (scene as? UIWindowScene) else { return }
  }
SceneDelegateのscene関数を更新する
次のコードスニペットでは、guard文を使ってwindowSceneを安全に取得しています。続いて、このwindowSceneを、SceneDelegateクラスの中で定義されているwindowプロパティに割り当てます。最後に、makeKeyAndVisibleメソッドを呼んで、windowをキーウィンドウにします。
var window: UIWindow?

func scene(\_ scene: UIScene, willConnectTo session: UISceneSession, options connectionOptions: UIScene.ConnectionOptions) {
guard let windowScene = (scene as? UIWindowScene) else { return }
window?.windowScene = windowScene
window?.makeKeyAndVisible()
}
次に、tab bar controllerの作成に取りかかりましょう。このcontrollerは、アプリの各タブのview controllerを扱います。たとえば、タブが2つあるなら、別々のnavigation controllerが2つ必要です。 でも、なぜnavigation controllerを選ぶのでしょうか? それは、各タブの中にそれぞれ独自のnavigation controllerを持たせたいからです。「Profile」タブを例にとりましょう。プロフィール画面はそのタブのメインのビューになりますが、タブの中には、行き来したい別のビューがあるかもしれません。だからこそ、各タブのアイテムにnavigation controllerを使うのです。navigation controllerは、タブの中の異なるview controllerの間をスムーズに移動するために必要な機能を提供してくれます。
コードを書いてみましょう!
 func scene(_ scene: UIScene, willConnectTo session: UISceneSession, options connectionOptions: UIScene.ConnectionOptions) {
    guard let windowScene = (scene as? UIWindowScene) else { return }
    window?.windowScene = windowScene
    window?.makeKeyAndVisible()

    let tabbar = UITabBarController()

    let firstVC = UINavigationController(rootViewController: ViewController())
    let secondVC = UINavigationController(rootViewController: SecondViewController())


    firstVC.tabBarItem = UITabBarItem(title: "Home", image: UIImage(systemName: "house"),selectedImage: UIImage(systemName: "house.fill"))

    secondVC.tabBarItem = UITabBarItem(title: "Profile", image: UIImage(systemName: "person"),selectedImage: UIImage(systemName: "person.fill"))

    tabbar.viewControllers = [firstVC, secondVC]

    window?.rootViewController = tabbar

  }
tab bar controllerを初期化したら、アプリの2つのタブのアイテムに対応する、2つのnavigation controllerを作ります。最初のview controllerはデフォルトのもので、2つ目のview controllerであるSecondViewControllerは次のセクションで扱います。SecondViewControllerは、デフォルトのものと同じような普通のview controllerです。
タブのアイテムを設定するため、UITabBarItemを使って各navigation controllerのtabItemプロパティを設定します。
最後に、作ったview controllerをtab bar controllerのviewControllersプロパティに割り当てます。
そして最も重要なステップは、windowのrootViewControllerにtab bar controllerを設定することです。これによって、tab barと、各タブのアイテムの中のnavigation controllerが、アプリの階層の一番上に置かれます。
View Controllerの動作
下のViewControllerクラスを見てみましょう。
class ViewController: UIViewController {

    override func viewDidLoad() {
      super.viewDidLoad()
      setupUI()
    }

    func setupUI(){
      view.backgroundColor = .white

      let homeLabel: UILabel = {
        let label = UILabel()
        label.text = "This is home screen"
        label.translatesAutoresizingMaskIntoConstraints = false
        return label
      }()

      let homeButton: UIButton = {
        let button = UIButton()
        button.setTitle("Go to profile", for: .normal)
        button.setTitleColor(.white, for: .normal)
        button.backgroundColor = .systemOrange
        button.translatesAutoresizingMaskIntoConstraints = false
        button.addTarget(self, action: #selector(goToProfile), for: .touchUpInside)
        return button
      }()

      view.addSubview(homeButton)
      view.addSubview(homeLabel)


      NSLayoutConstraint.activate([
        homeButton.bottomAnchor.constraint(equalTo: view.safeAreaLayoutGuide.bottomAnchor),
        homeButton.widthAnchor.constraint(equalTo: view.widthAnchor),
        homeButton.heightAnchor.constraint(equalToConstant: 72),
        homeLabel.centerXAnchor.constraint(equalTo: view.centerXAnchor),
        homeLabel.centerYAnchor.constraint(equalTo: view.centerYAnchor)
      ])

    }

    @objc func goToProfile(){
      tabBarController?.selectedIndex = 1
    }

}
そしてSecondViewControllerです(ええ、わかっています、ひどい命名ですよね…)

class SecondViewController: UIViewController {
override func viewDidLoad() {
super.viewDidLoad()
setupUI()
}

    func setupUI(){
      view.backgroundColor = .white

      let profileLabel: UILabel = {
        let label = UILabel()
        label.translatesAutoresizingMaskIntoConstraints = false
        label.text = "This is profile screen"
        return label
      }()

      let profileButton: UIButton = {
        let button = UIButton()
        button.setTitle("Go to home", for: .normal)
        button.setTitleColor(.white, for: .normal)
        button.backgroundColor = .systemOrange
        button.translatesAutoresizingMaskIntoConstraints = false
        button.addTarget(self, action: #selector(goToHome), for: .touchUpInside)
        return button
      }()

      view.addSubview(profileButton)
      view.addSubview(profileLabel)

      NSLayoutConstraint.activate([
        homeButton.bottomAnchor.constraint(equalTo: view.safeAreaLayoutGuide.bottomAnchor),
        homeButton.widthAnchor.constraint(equalTo: view.widthAnchor),
        homeButton.heightAnchor.constraint(equalToConstant: 72),
        homeLabel.centerXAnchor.constraint(equalTo: view.centerXAnchor),
        homeLabel.centerYAnchor.constraint(equalTo: view.centerYAnchor)
      ])

    }

    @objc func goToHome(){
      tabBarController?.selectedIndex = 0
    }

}
見てのとおり、コードはかなり重複しています。でも、この記事の目的のためには気にしなくて大丈夫です。
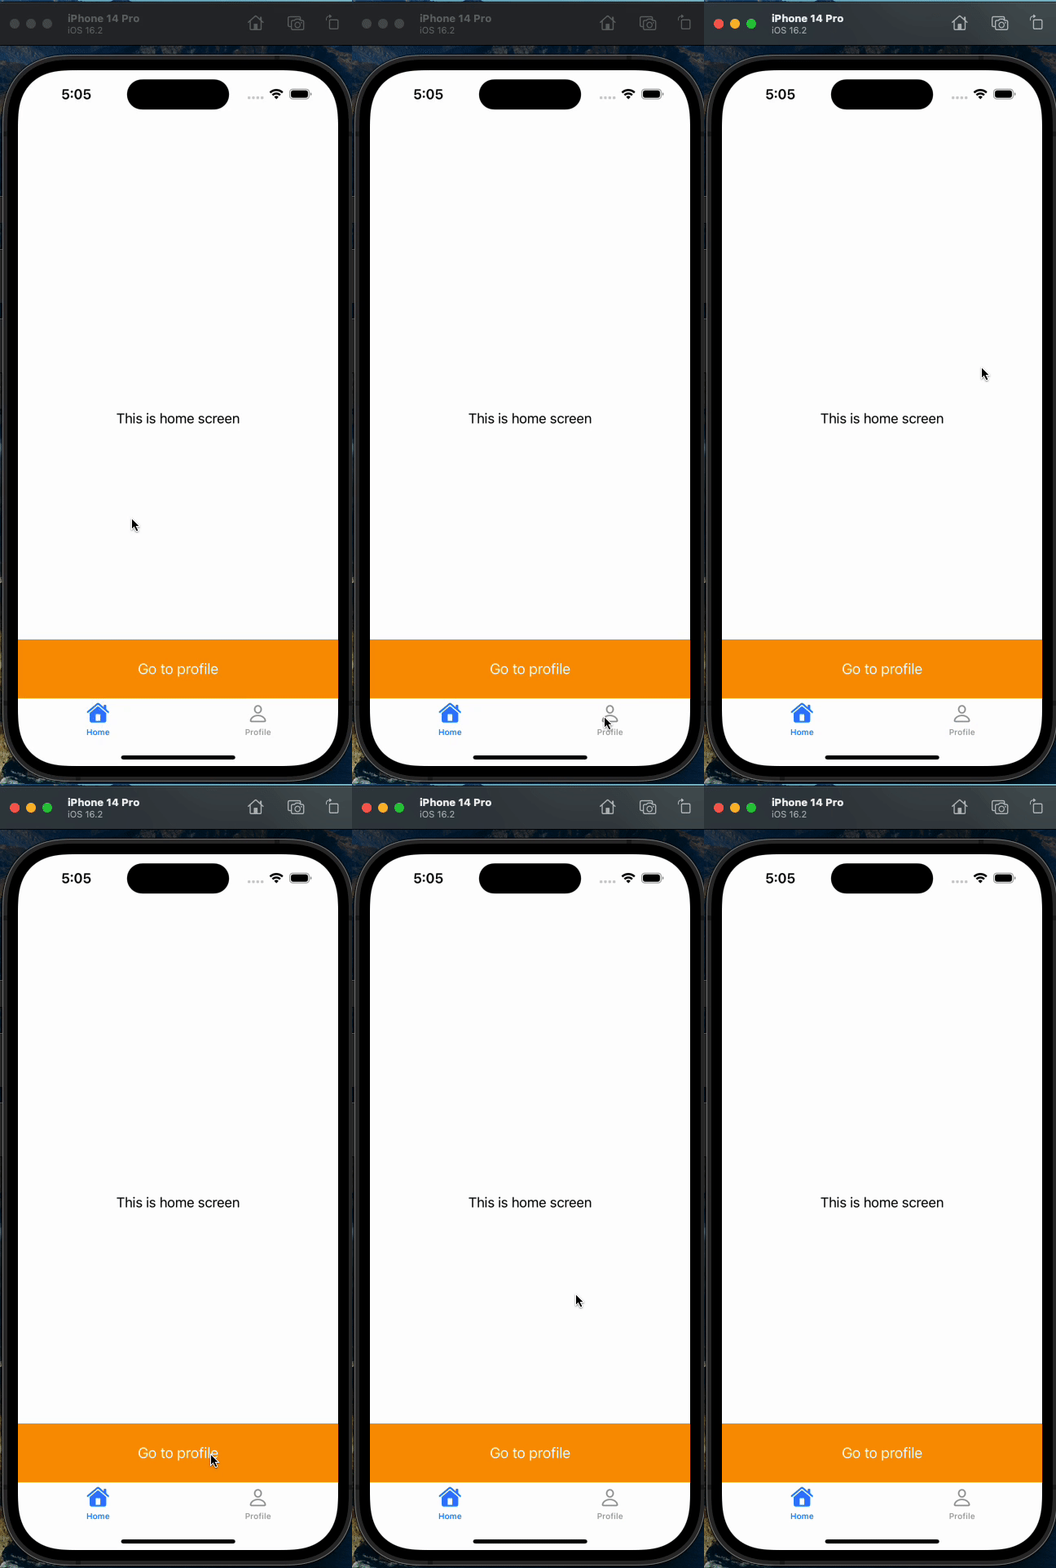
この2つのview controllerは、タイトルとボタンのアクションを除けば、基本的に同じです。どちらのcontrollerも主に画面の中央にラベルを描画し、現在の画面の名前を表示します。さらに、画面の下部にボタンがあり、タブのアイテム間を移動できます。これがこれらのview controllerの中心的な機能です。
最新の状態
これで、tab barとnavigation controllerを使った、storyboardをひとつも使わない完全にコードだけのアプリができました!
まとめ
まとめると、コードで組み立てるアプローチを採用すると、アプリのデザインとスケーラビリティをより細かくコントロールでき、開発者はstoryboardだけに頼るのではなく、プログラミングそのものに集中できます。特にIBAction/IBOutletの問題についてです**。**IBOutletやIBActionの変数を含むコードをリファクタリングするときに起こる問題のひとつは、変更後に接続をやり直す必要があることです。私の経験では、コードベースで数日作業したあと、はっきりした理由もなくアプリが予期せずクラッシュするようになりました。さらに調べてみると、クラッシュの原因はIBOutletやIBActionの変数名を変更したことでした。そのたびに、影響を受けた変数を手動でつなぎ直して、機能を回復させなければなりませんでした。これは時間がかかり、いらいらする作業で、開発の流れを乱してしまいます。
読んでいただきありがとうございました!