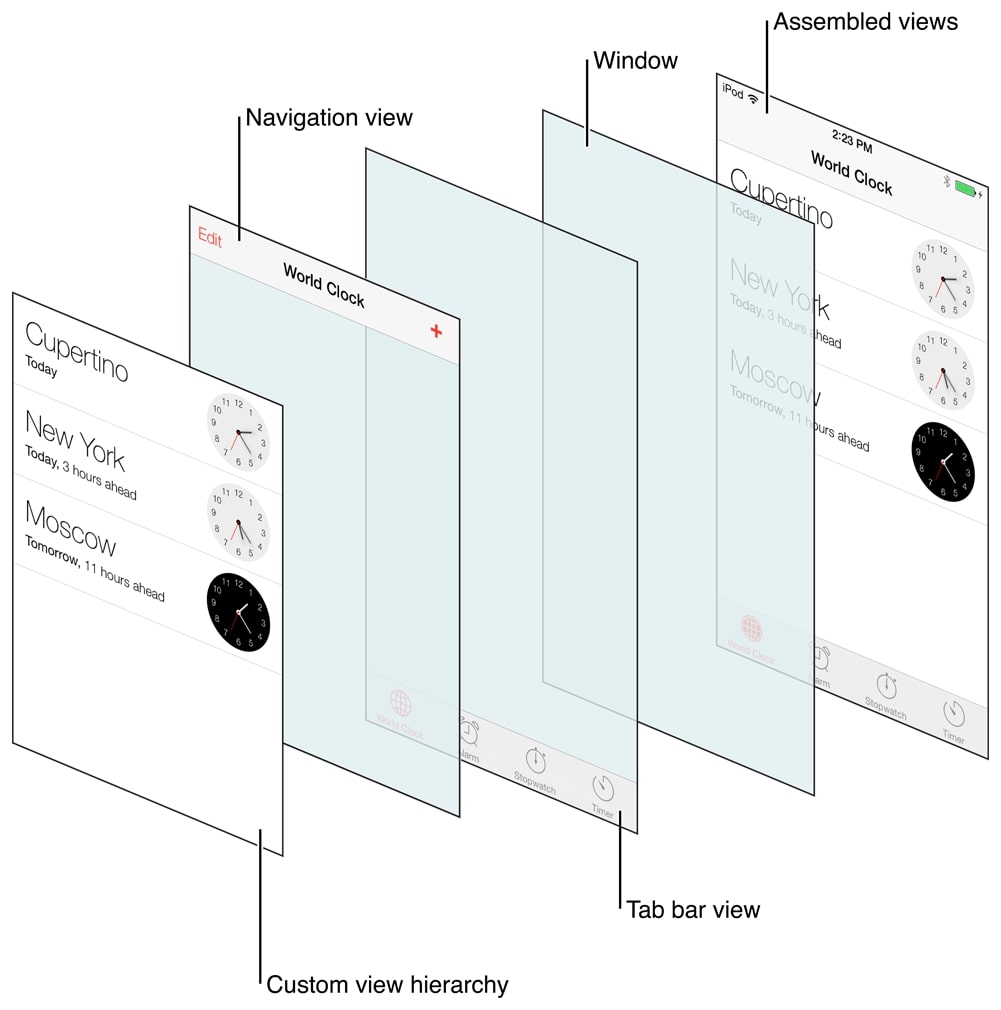
UIKit के साथ iOS mobile apps बनाते समय मेरा झुकाव हमेशा programmatic approach की तरफ रहा है। Storyboards शुरुआत में भले ही सुविधाजनक लगें, लेकिन उनके साथ काम करते हुए मुझे खुद programmer से ज़्यादा designer जैसा महसूस होता है। इसके अलावा, जब बात scalability और manageability की आती है, तो मुझे programmatic approach हर बार बेहतर लगती है।
इस article में मैं समझाऊँगा कि UIKit का इस्तेमाल करके navigation controller के साथ मिला हुआ tab bar controller कैसे बनाया जाता है।
SceneDelegate सेट करना
Programmatic approach अपनाने का पहला कदम है हमारे application के root code में बदलाव करना। मैं इसे "root" कहता हूँ, और यह मुझे React/React Native की App.js या index.js की याद दिलाता है। यही हमारे application या scene का entry point है। iOS में SceneDelegate class के अंदर एक scene function होता है, और हम application को programmatic development के लिए configure करने के लिए सिर्फ उसी का इस्तेमाल करेंगे।
नीचे SceneDelegate class का default structure है:
    import UIKit

    class SceneDelegate: UIResponder, UIWindowSceneDelegate {

      var window: UIWindow?


      func scene(_ scene: UIScene, willConnectTo session: UISceneSession, options connectionOptions: UIScene.ConnectionOptions) {
        // Use this method to optionally configure and attach the UIWindow `window` to the provided UIWindowScene `scene`.
        // If using a storyboard, the `window` property will automatically be initialized and attached to the scene.
        // This delegate does not imply the connecting scene or session are new (see `application:configurationForConnectingSceneSession` instead).
        guard let _ = (scene as? UIWindowScene) else { return }
      }

      func sceneDidDisconnect(_ scene: UIScene) {
        // Called as the scene is being released by the system.
        // This occurs shortly after the scene enters the background, or when its session is discarded.
        // Release any resources associated with this scene that can be re-created the next time the scene connects.
        // The scene may re-connect later, as its session was not necessarily discarded (see `application:didDiscardSceneSessions` instead).
      }

      func sceneDidBecomeActive(_ scene: UIScene) {
        // Called when the scene has moved from an inactive state to an active state.
        // Use this method to restart any tasks that were paused (or not yet started) when the scene was inactive.
      }

      func sceneWillResignActive(_ scene: UIScene) {
        // Called when the scene will move from an active state to an inactive state.
        // This may occur due to temporary interruptions (ex. an incoming phone call).
      }

      func sceneWillEnterForeground(_ scene: UIScene) {
        // Called as the scene transitions from the background to the foreground.
        // Use this method to undo the changes made on entering the background.
      }

      func sceneDidEnterBackground(_ scene: UIScene) {
        // Called as the scene transitions from the foreground to the background.
        // Use this method to save data, release shared resources, and store enough scene-specific state information
        // to restore the scene back to its current state.
      }
    }
हम सिर्फ नीचे वाले function को update करेंगे:
func scene(_ scene: UIScene, willConnectTo session: UISceneSession, options connectionOptions: UIScene.ConnectionOptions) {
    // Use this method to optionally configure and attach the UIWindow `window` to the provided UIWindowScene `scene`.
    // If using a storyboard, the `window` property will automatically be initialized and attached to the scene.
    // This delegate does not imply the connecting scene or session are new (see `application:configurationForConnectingSceneSession` instead).
    guard let _ = (scene as? UIWindowScene) else { return }
  }
SceneDelegate में scene function को update करना
नीचे दिए गए code snippet में हम guard statement की मदद से windowScene को सुरक्षित तरीके से हासिल करते हैं। इसके बाद हम इस windowScene को window property को assign करते हैं, जो SceneDelegate class के अंदर defined है। आखिर में हम makeKeyAndVisible method को call करते हैं ताकि यह window key window बन जाए।
var window: UIWindow?

func scene(\_ scene: UIScene, willConnectTo session: UISceneSession, options connectionOptions: UIScene.ConnectionOptions) {
guard let windowScene = (scene as? UIWindowScene) else { return }
window?.windowScene = windowScene
window?.makeKeyAndVisible()
}
अब tab bar controller बनाने पर ध्यान देते हैं। यह controller हमारे app के हर tab के view controllers को संभालेगा। उदाहरण के लिए, अगर हमारे पास दो tabs हैं, तो हमें दो अलग navigation controllers चाहिए होंगे। लेकिन हम navigation controllers ही क्यों चुनते हैं? वजह यह है कि हम हर tab के अंदर उसका अपना navigation controller चाहते हैं। "Profile" tab को उदाहरण के तौर पर लीजिए। Profile screen उस tab का main view होगा, लेकिन उसी tab के अंदर कुछ और views भी हो सकते हैं जिनके बीच हम navigate करना चाहते हैं। इसीलिए हम हर tab item के लिए navigation controller इस्तेमाल करते हैं। ये एक tab के अंदर अलग अलग view controllers के बीच आसानी से navigate करने के लिए ज़रूरी functionality देते हैं।
चलिए इसे code करते हैं!
 func scene(_ scene: UIScene, willConnectTo session: UISceneSession, options connectionOptions: UIScene.ConnectionOptions) {
    guard let windowScene = (scene as? UIWindowScene) else { return }
    window?.windowScene = windowScene
    window?.makeKeyAndVisible()

    let tabbar = UITabBarController()

    let firstVC = UINavigationController(rootViewController: ViewController())
    let secondVC = UINavigationController(rootViewController: SecondViewController())


    firstVC.tabBarItem = UITabBarItem(title: "Home", image: UIImage(systemName: "house"),selectedImage: UIImage(systemName: "house.fill"))

    secondVC.tabBarItem = UITabBarItem(title: "Profile", image: UIImage(systemName: "person"),selectedImage: UIImage(systemName: "person.fill"))

    tabbar.viewControllers = [firstVC, secondVC]

    window?.rootViewController = tabbar

  }
Tab bar controller को initialize करने के बाद हम दो navigation controllers बनाते हैं, जो हमारे app के दो tab items से जुड़े हैं। पहला view controller default वाला है, जबकि दूसरा view controller, जिसका नाम SecondViewController है, अगले section में कवर किया जाएगा। SecondViewController भी default वाले जैसा ही एक सामान्य view controller है।
Tab items को configure करने के लिए हम हर navigation controller की tabItem property को UITabBarItem से set करते हैं।
आखिर में, बनाए गए view controllers को tab bar controller की viewControllers property में assign करते हैं।
और सबसे ज़रूरी कदम है window के rootViewController को हमारे tab bar controller पर set करना। इससे यह पक्का होता है कि tab bar, हर tab item के अंदर के navigation controllers के साथ, हमारे app की hierarchy में सबसे ऊपर रहे।
View Controllers काम करते हुए
नीचे हमारी ViewController class पर एक नज़र डालते हैं:
class ViewController: UIViewController {

    override func viewDidLoad() {
      super.viewDidLoad()
      setupUI()
    }

    func setupUI(){
      view.backgroundColor = .white

      let homeLabel: UILabel = {
        let label = UILabel()
        label.text = "This is home screen"
        label.translatesAutoresizingMaskIntoConstraints = false
        return label
      }()

      let homeButton: UIButton = {
        let button = UIButton()
        button.setTitle("Go to profile", for: .normal)
        button.setTitleColor(.white, for: .normal)
        button.backgroundColor = .systemOrange
        button.translatesAutoresizingMaskIntoConstraints = false
        button.addTarget(self, action: #selector(goToProfile), for: .touchUpInside)
        return button
      }()

      view.addSubview(homeButton)
      view.addSubview(homeLabel)


      NSLayoutConstraint.activate([
        homeButton.bottomAnchor.constraint(equalTo: view.safeAreaLayoutGuide.bottomAnchor),
        homeButton.widthAnchor.constraint(equalTo: view.widthAnchor),
        homeButton.heightAnchor.constraint(equalToConstant: 72),
        homeLabel.centerXAnchor.constraint(equalTo: view.centerXAnchor),
        homeLabel.centerYAnchor.constraint(equalTo: view.centerYAnchor)
      ])

    }

    @objc func goToProfile(){
      tabBarController?.selectedIndex = 1
    }

}
और SecondViewController (हाँ मुझे पता है, यहाँ naming convention काफी खराब है...)

class SecondViewController: UIViewController {
override func viewDidLoad() {
super.viewDidLoad()
setupUI()
}

    func setupUI(){
      view.backgroundColor = .white

      let profileLabel: UILabel = {
        let label = UILabel()
        label.translatesAutoresizingMaskIntoConstraints = false
        label.text = "This is profile screen"
        return label
      }()

      let profileButton: UIButton = {
        let button = UIButton()
        button.setTitle("Go to home", for: .normal)
        button.setTitleColor(.white, for: .normal)
        button.backgroundColor = .systemOrange
        button.translatesAutoresizingMaskIntoConstraints = false
        button.addTarget(self, action: #selector(goToHome), for: .touchUpInside)
        return button
      }()

      view.addSubview(profileButton)
      view.addSubview(profileLabel)

      NSLayoutConstraint.activate([
        homeButton.bottomAnchor.constraint(equalTo: view.safeAreaLayoutGuide.bottomAnchor),
        homeButton.widthAnchor.constraint(equalTo: view.widthAnchor),
        homeButton.heightAnchor.constraint(equalToConstant: 72),
        homeLabel.centerXAnchor.constraint(equalTo: view.centerXAnchor),
        homeLabel.centerYAnchor.constraint(equalTo: view.centerYAnchor)
      ])

    }

    @objc func goToHome(){
      tabBarController?.selectedIndex = 0
    }

}
ज़ाहिर है, code काफी repetitive है। लेकिन इस article के मकसद के लिए इसे नज़रअंदाज़ किया जा सकता है।
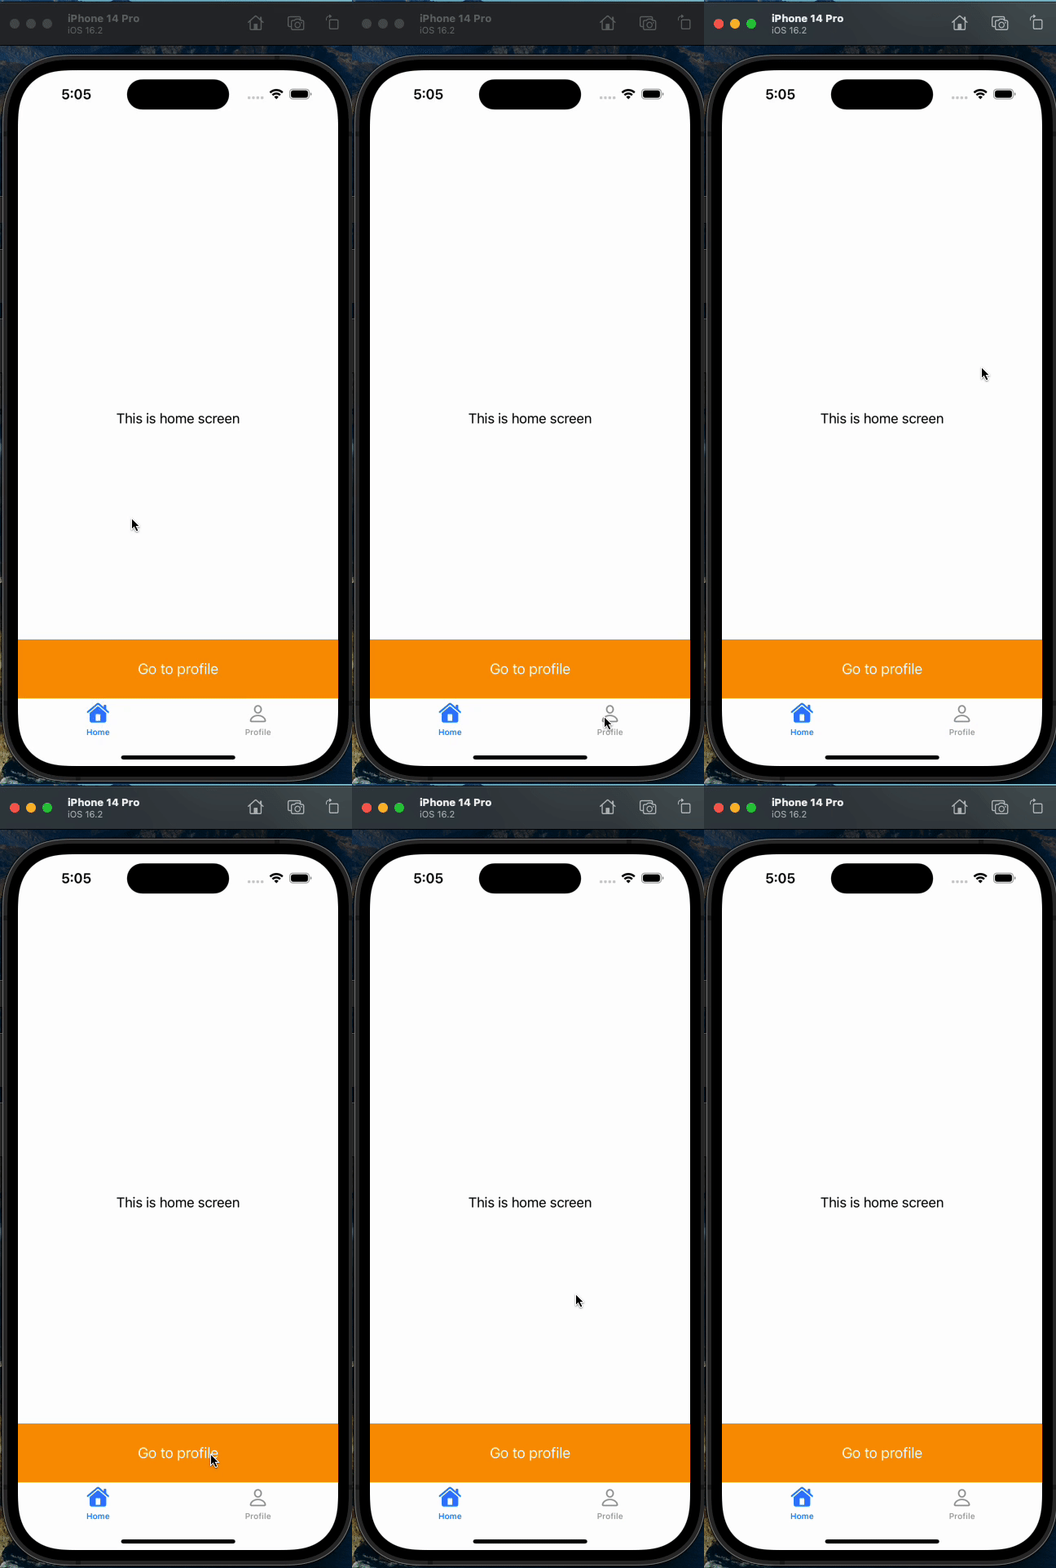
ये दोनों view controllers असल में एक जैसे हैं, बस इनके titles और button actions अलग हैं। दोनों controllers मुख्य रूप से screen के बीच में एक label render करते हैं, जो मौजूदा screen का नाम बताता है। इसके अलावा, दोनों में screen के नीचे एक button है, जिससे tab items के बीच navigate किया जा सकता है। इन view controllers की मुख्य functionality बस इतनी ही है।
अब की तस्वीर
अब हमारे पास एक पूरी तरह programmatic app है जो tab bar और navigation controller इस्तेमाल करता है, और storyboard एक भी नहीं!
निष्कर्ष
कुल मिलाकर, programmatic approach अपनाने से app के design और scalability पर ज़्यादा control मिलता है, और developers सिर्फ storyboards पर निर्भर रहने के बजाय programming पर ध्यान दे पाते हैं। खास तौर पर IBAction/IBOutlet की समस्याओं के मामले में**। **IBOutlet और IBAction variables वाले code को refactor करते समय एक खास समस्या आती है: बदलाव करने के बाद connections को फिर से जोड़ना पड़ता है। मेरे अनुभव में, codebase पर कुछ दिन काम करने के बाद app बिना किसी साफ वजह के अचानक crash होने लगा। गहराई से जाँच करने पर पता चला कि इन crashes की वजह IBOutlet और IBAction variables के बदले हुए नाम थे। हर बार ऐसा होने पर मुझे प्रभावित variables को manually दोबारा connect करना पड़ता था ताकि वे फिर से काम करें। यह प्रक्रिया काफी समय लेने वाली और झुंझलाने वाली हो सकती है, और development workflow को बिगाड़ देती है।
पढ़ने के लिए धन्यवाद!